How to easily audit Microsoft Office 365 license assignments in no time!
When it’s time to do Microsoft Office 365 license reporting, some IT admins may be asked to find out which employees have what type of license and when they were assigned.
Finding the right information in your tenant can be challenging because the admin portals can only tell you what Microsoft Office 365 license each user has assigned but not when it was assigned. Luckily, there are a few options available to IT admins.
Admin centers: Limited Microsoft Office 365 license information
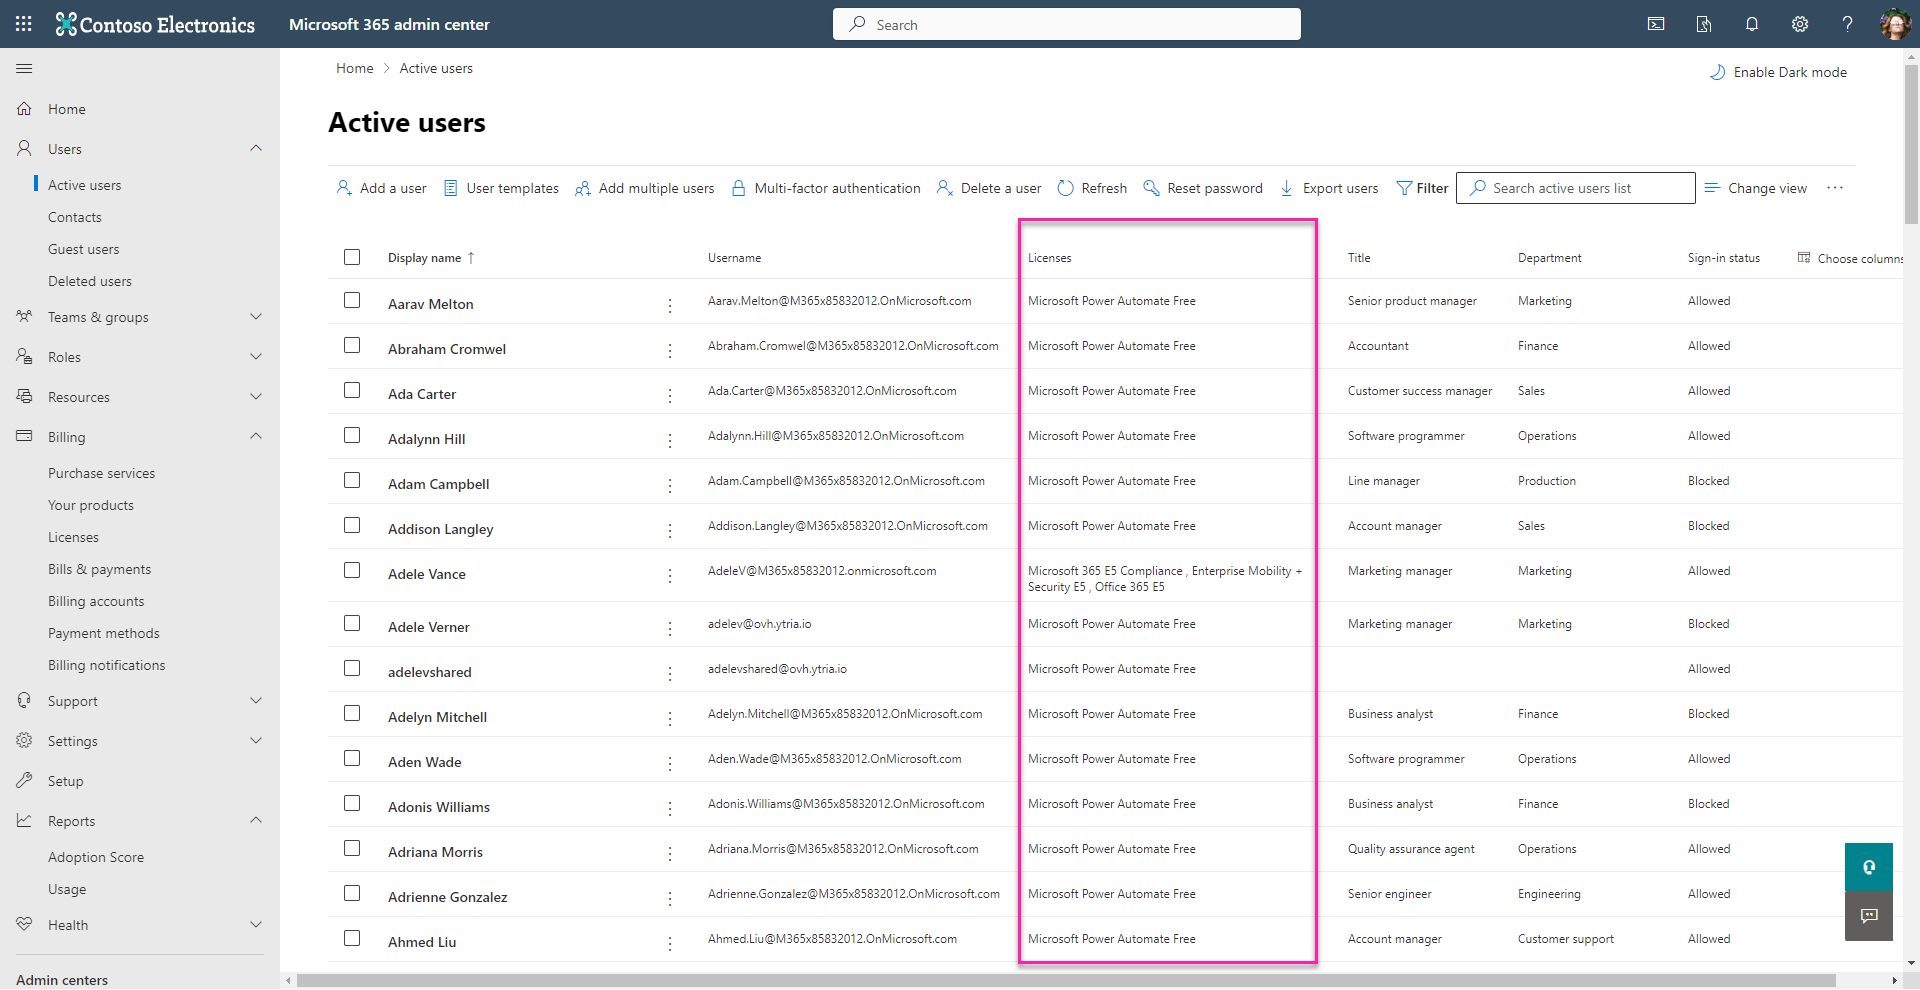
If you try to use the general Microsoft 365 admin center, you will only see a list of assigned licenses for each user. The information provided is limited.
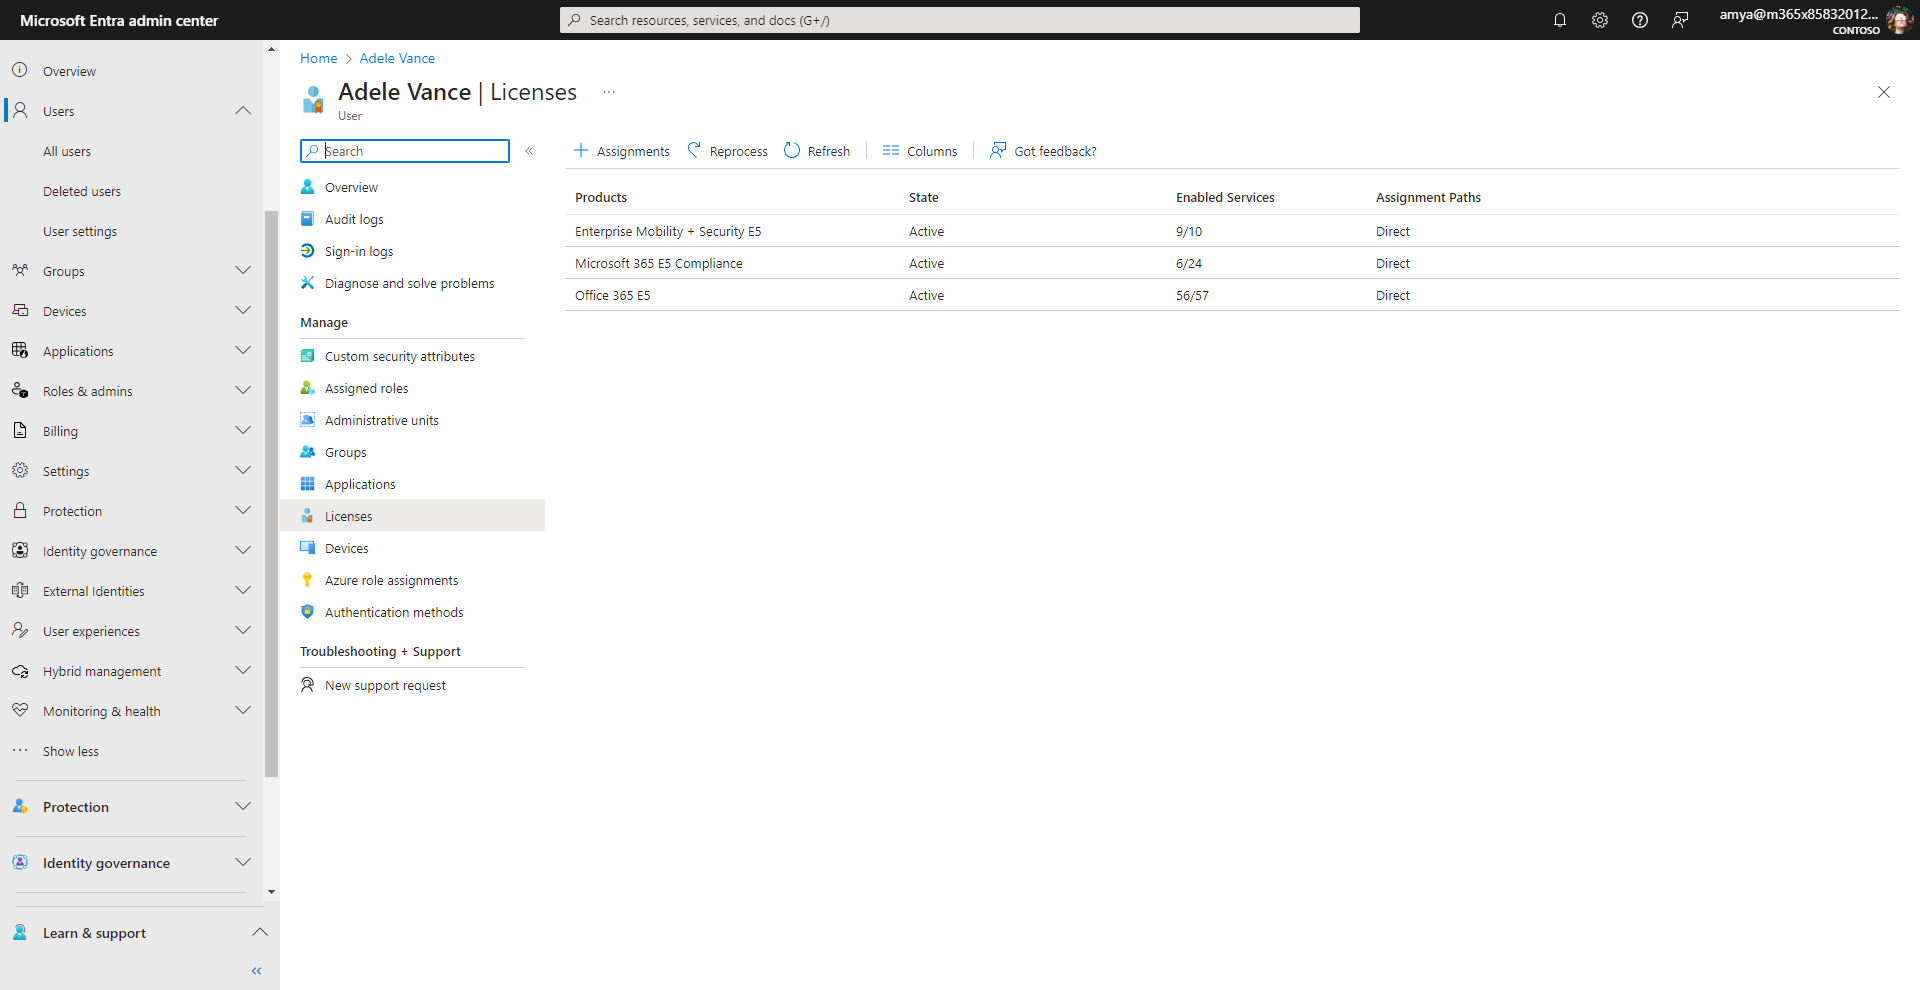
With the Microsoft Entra admin center, you must click on each user on the list to see the licenses and a summary of enabled service plans.
The Microsoft 365 Active Users report: not all service plans included
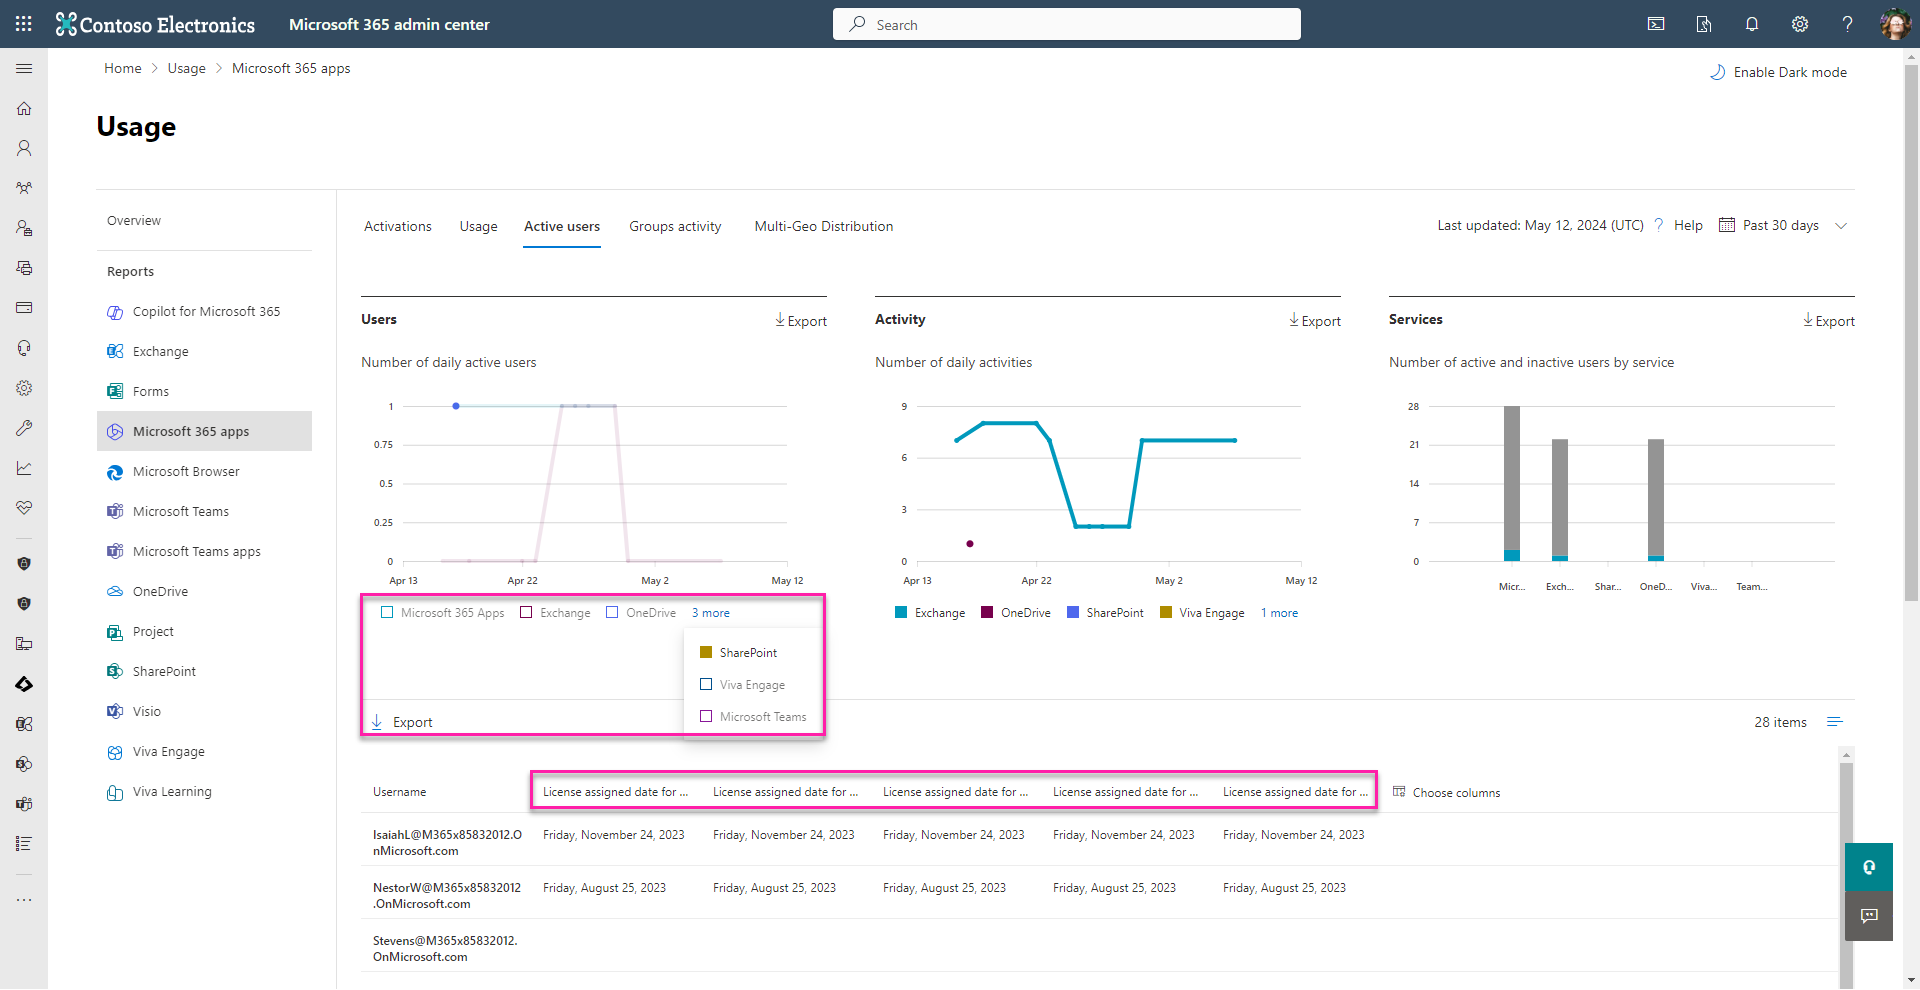
When you get the Microsoft 365 Active users report, you will see that it only includes Microsoft 365 apps, Exchange, OneDrive, Teams, SharePoint, and Viva Engage.
Unless you’re interested in auditing Microsoft Office 365 license assignments based on these few service plans, you will not be able to get all the information you need in either of the admin centers. Your other option is to use PowerShell.
Get Microsoft Office 365 license assignment dates with Microsoft Graph PowerShell
To retrieve detailed service plan information, you can use Microsoft Graph PowerShell.
Your script will first need to retrieve each user’s assigned licenses with the Get-MgUserLicenseDetail cmdlet.
Example: Get-MgUserLicenseDetail -UserId “username@company.com”
The parameter “-Property ServicePlans” can be used to retrieve service plan details for each assigned license.
This page has detailed instructions on how to do just that.
You may be worried that putting a script together seems complex. You’re right, it is a complex script. You also know that there is no way to test the script to avoid unexpected errors. Luckily there’s an easier alternative, and it’s called sapio365.
Report Microsoft 365 Office license assignment and costs with sapio365
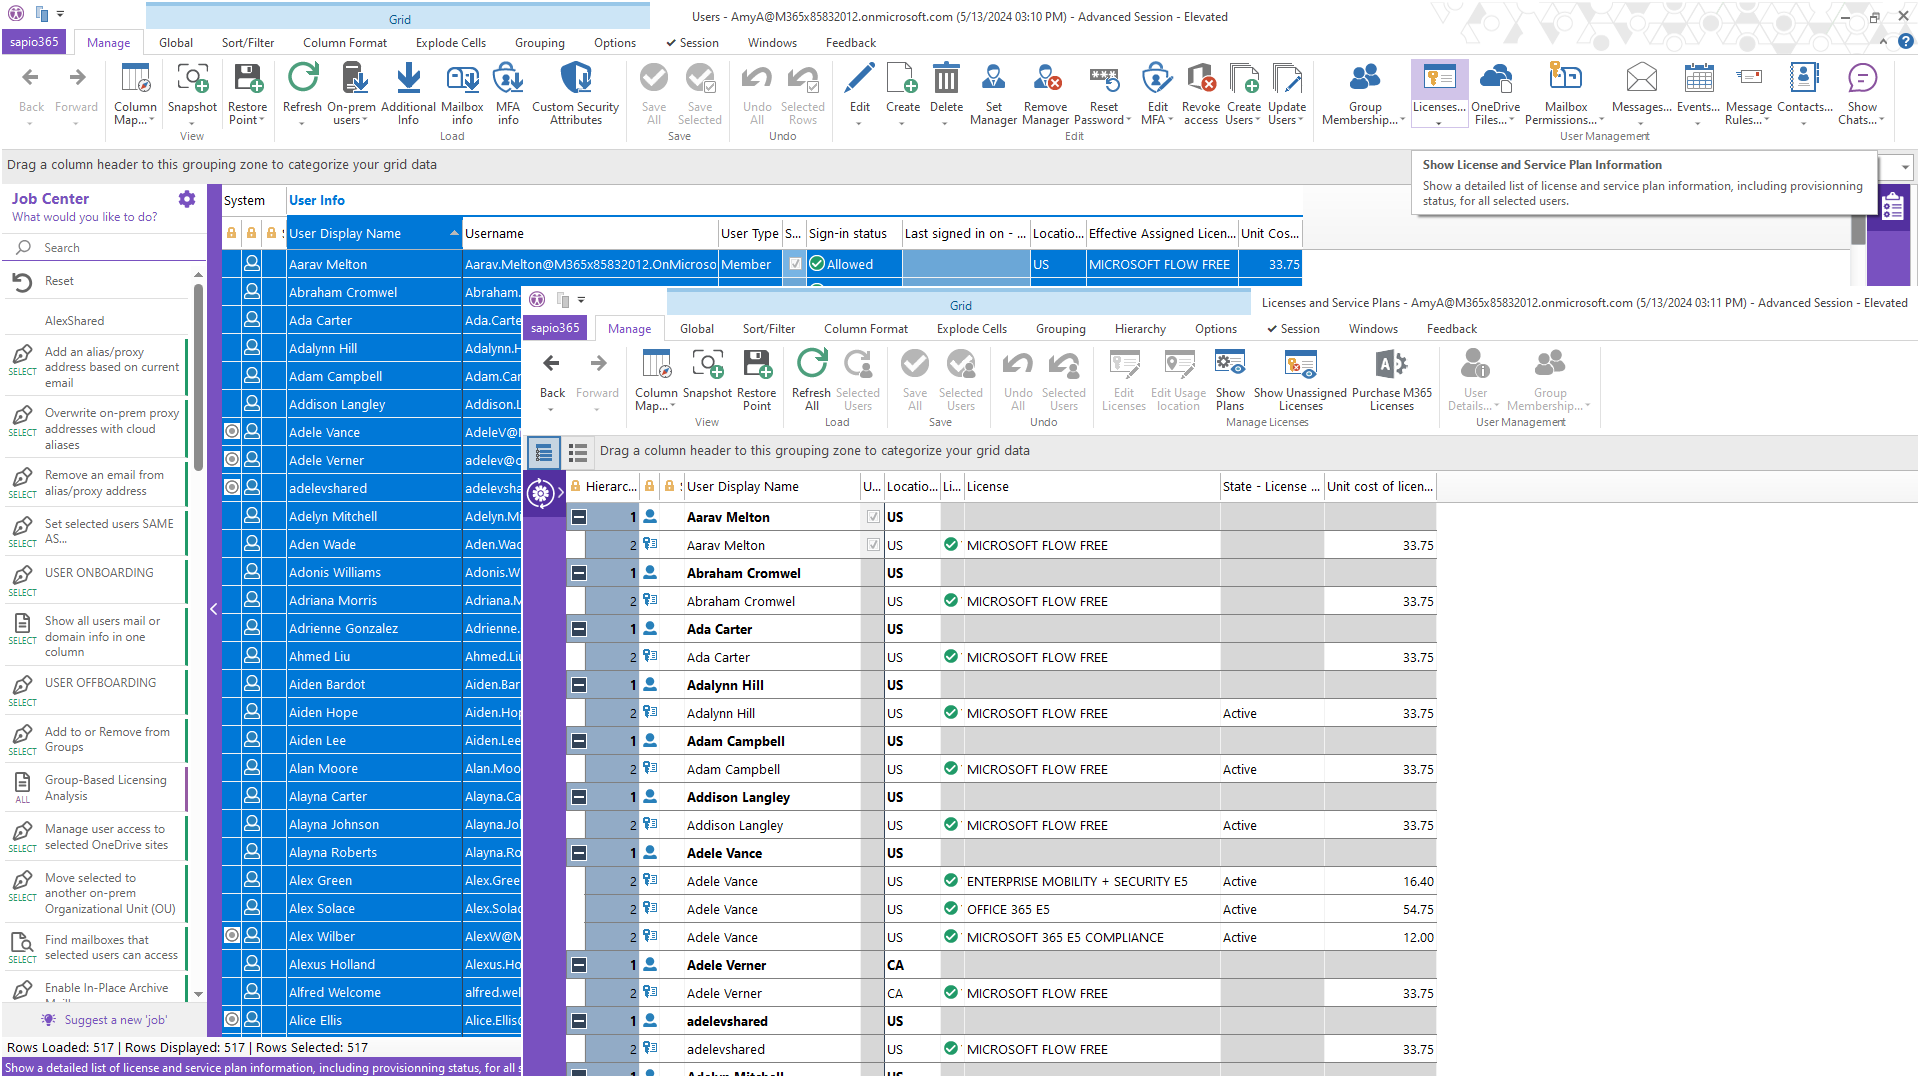
One of the advantages of using sapio365 is that it gives you a complete picture of user accounts and their assigned Microsoft Office 365 licenses all at once in one place. You can watch this quick video to see how it’s done, or continue reading.
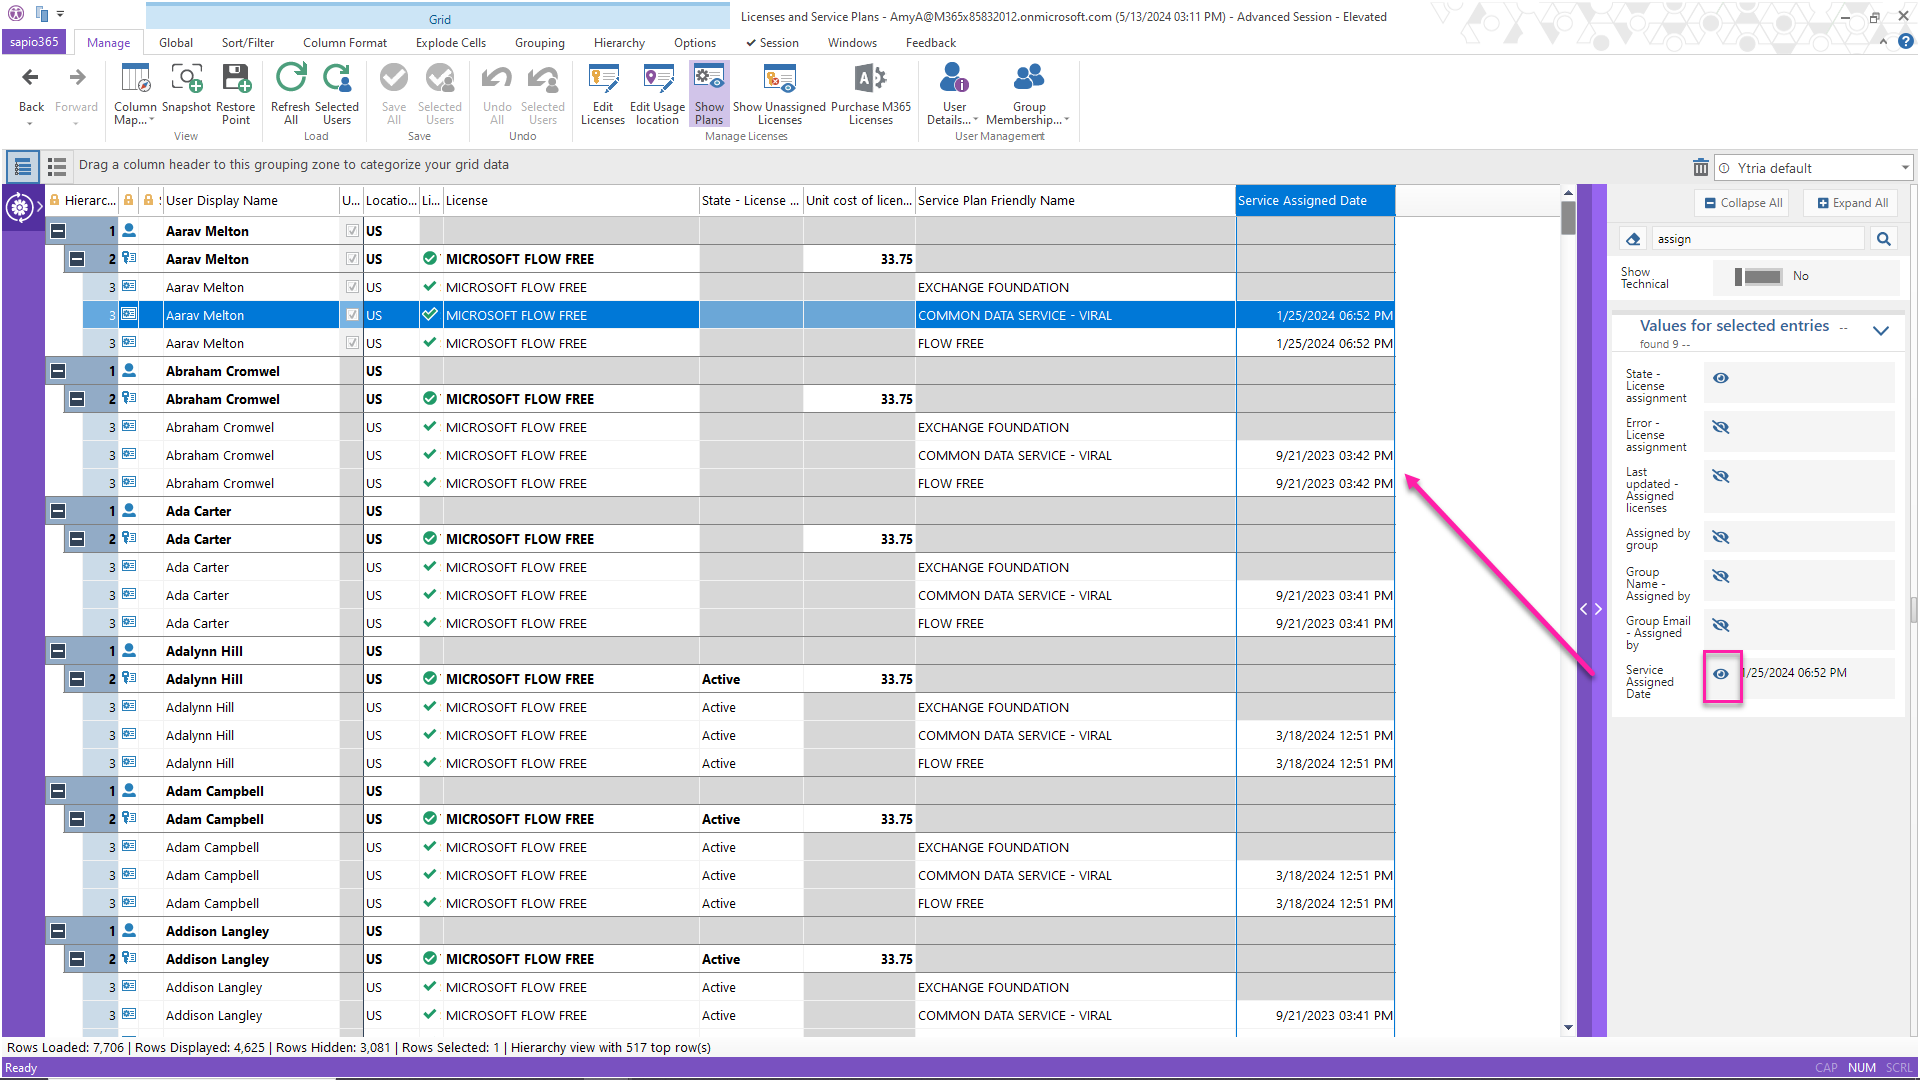
To start, select all users and get their assigned licenses.
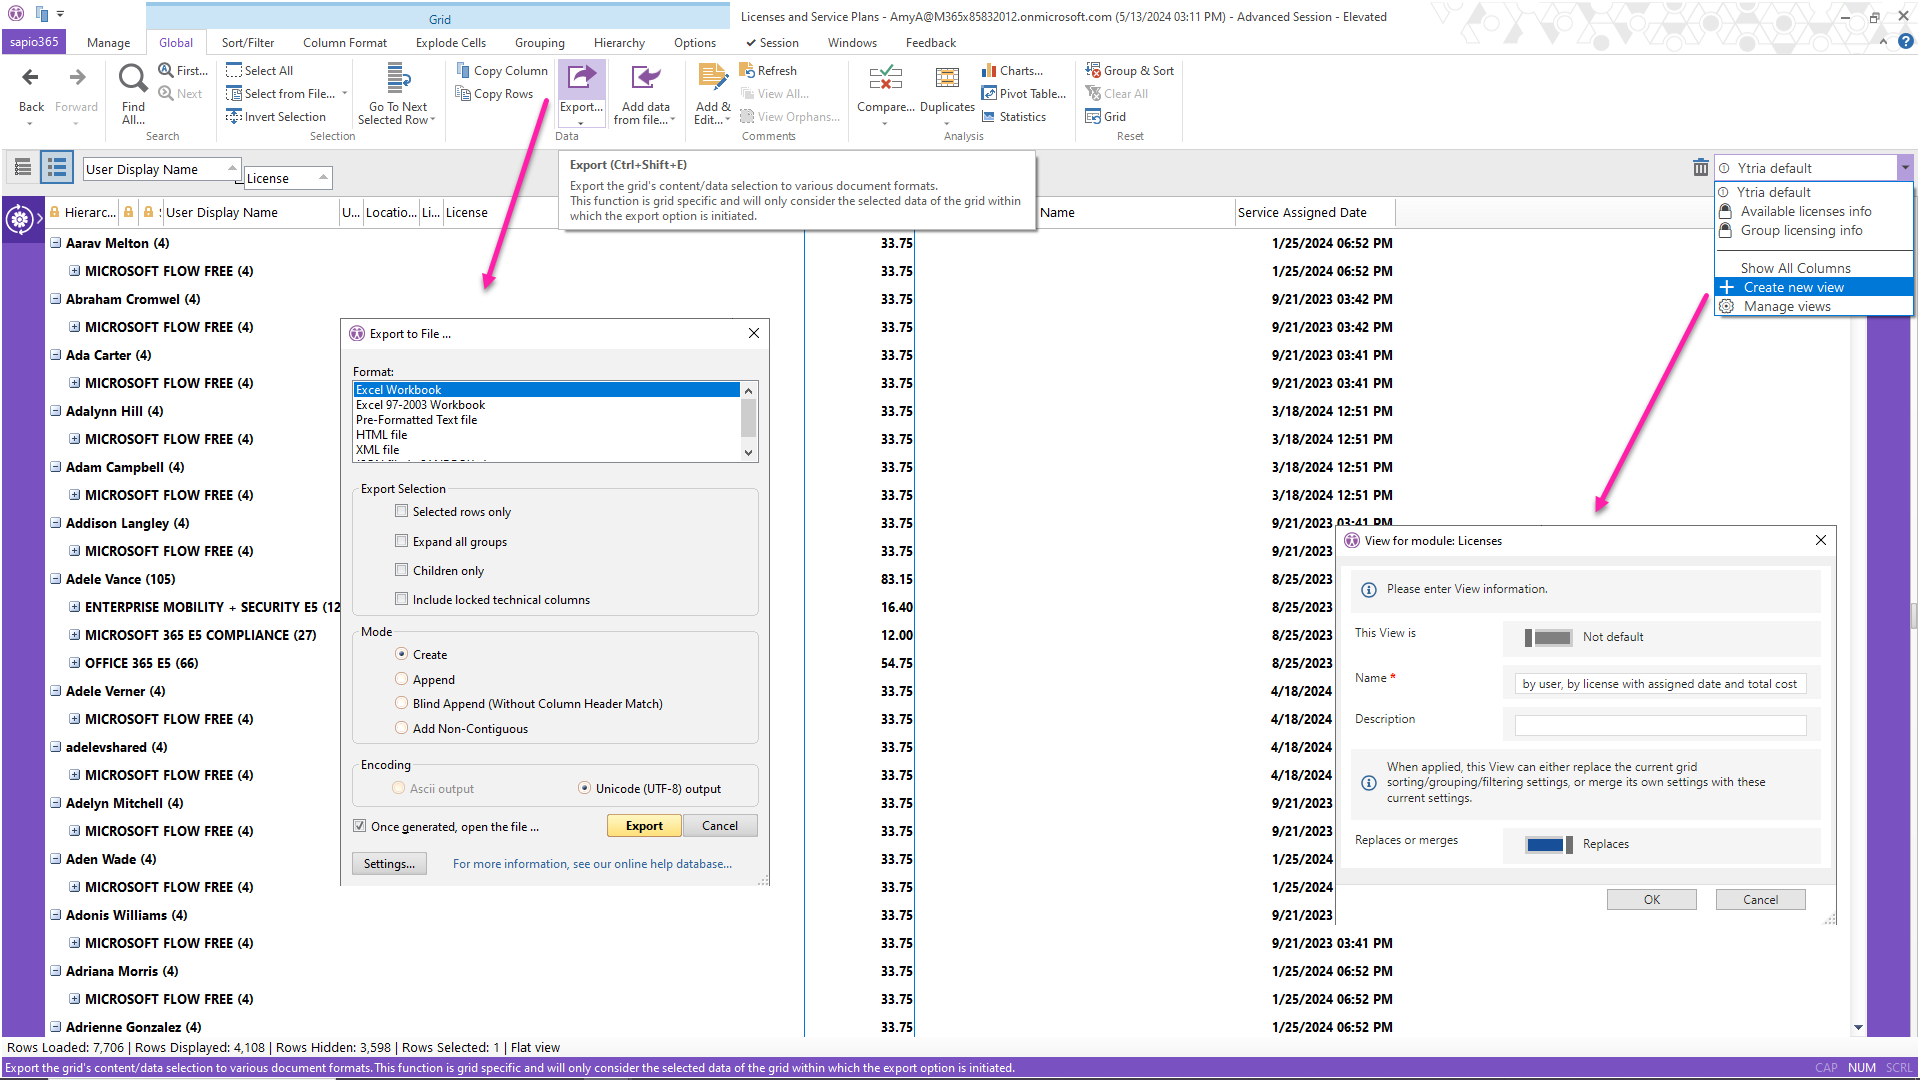
Add the service plan information by clicking on the “Service Plans” button and show the column ‘Service Assigned Date’.
It’s important to note that these dates must be regarded as approximations of when licenses were assigned because they reflect when services were activated, and not when the Microsoft Office 365 license was actually assigned by an administrator.
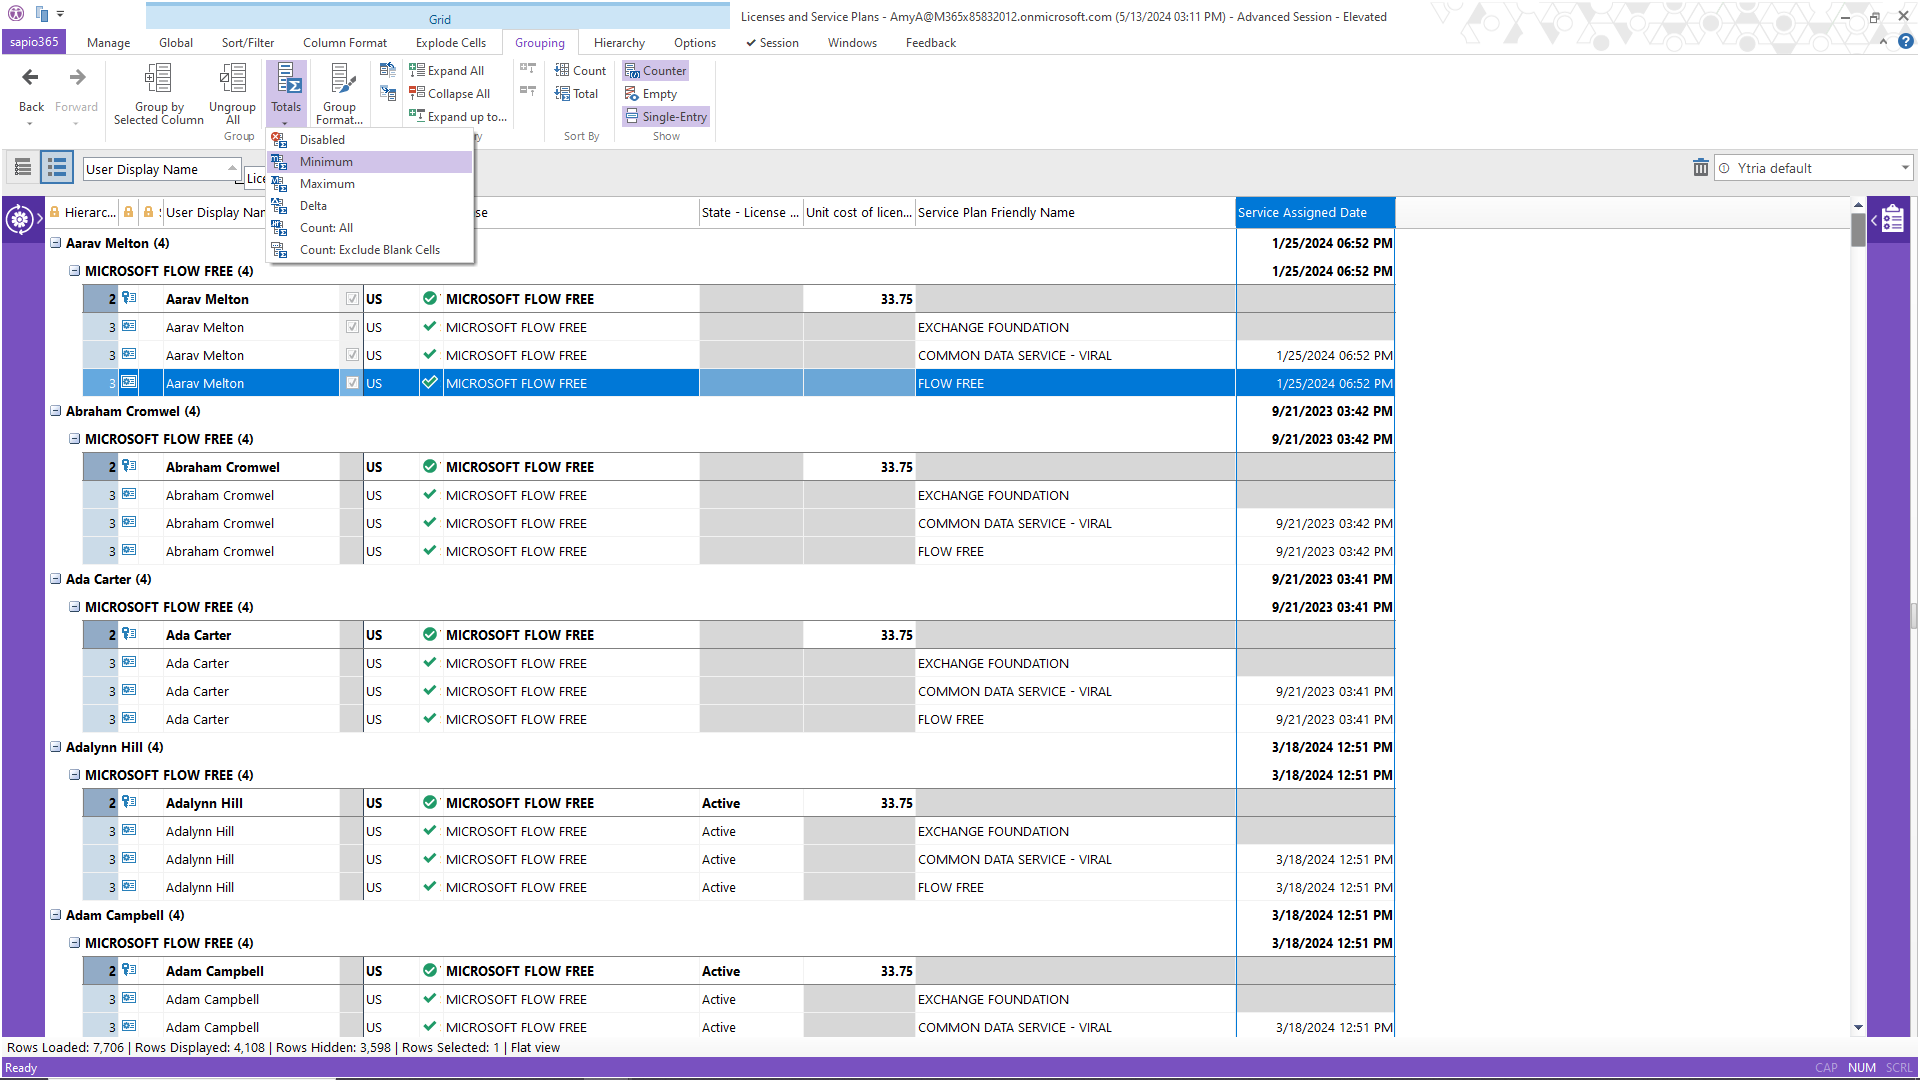
The next step is to group by users, and then by licenses.
Then select ‘Minimum’ on the ‘Service Assigned Date’ column to add the oldest date in the grouping.
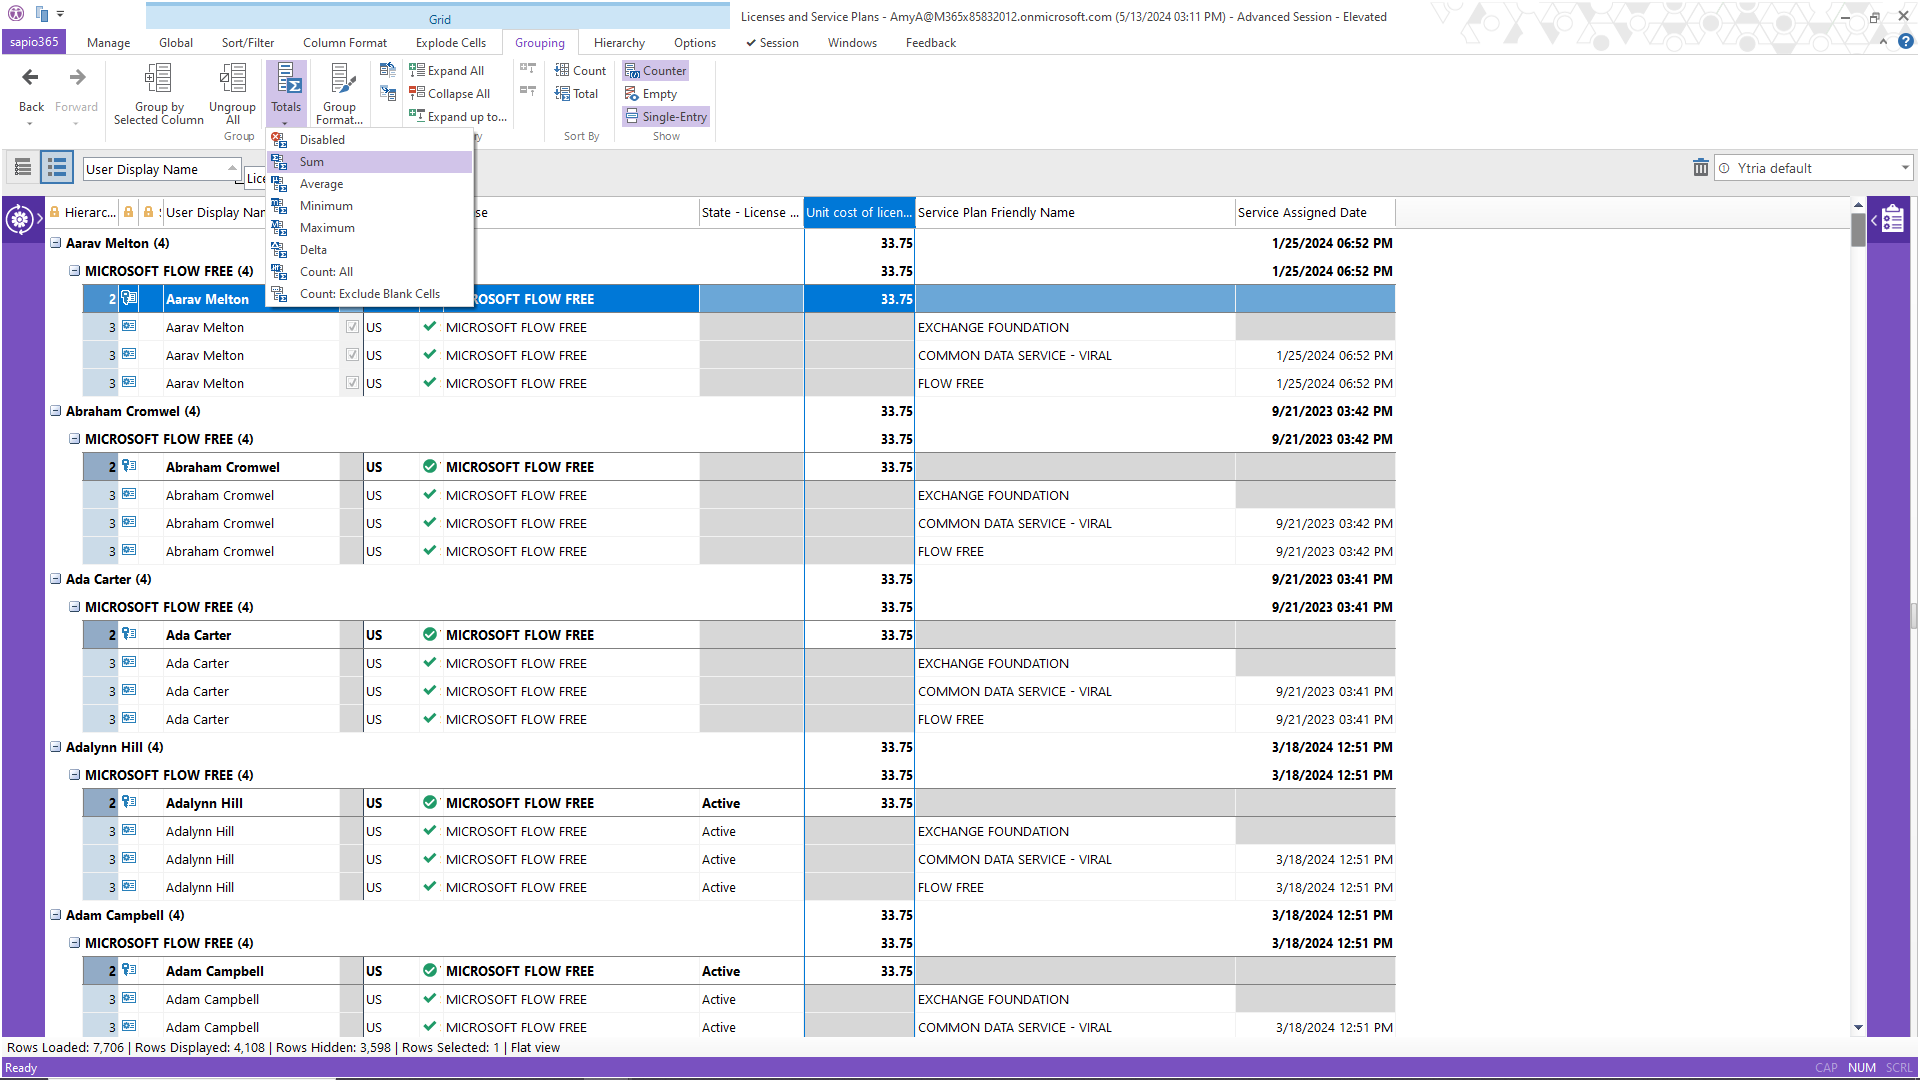
Finally, select ‘Sum’ on the ‘Unit cost’ column to add the total cost of assigned Microsoft Office 365 licenses by user.
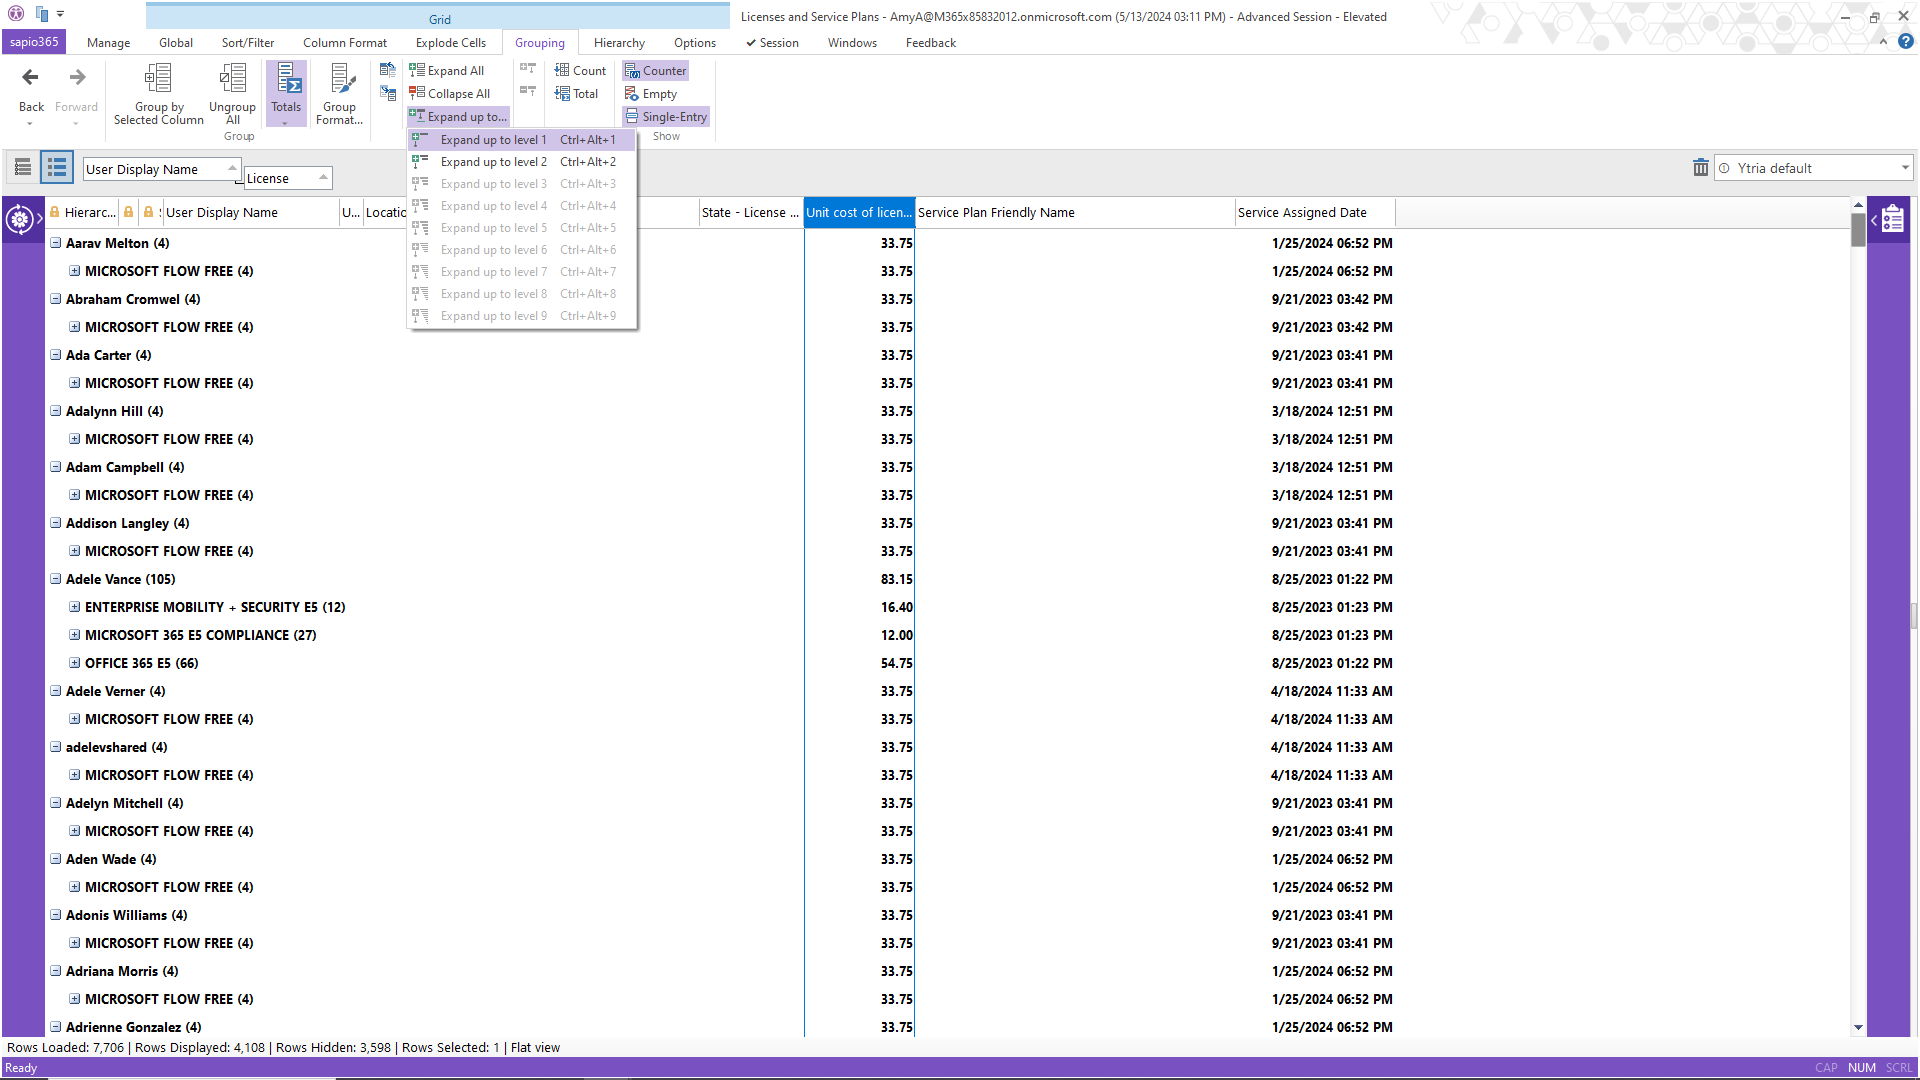
If you want to create a summarized view, you must expand to level 1.
With this information, you can now choose to export this view to a report or save it to apply it later.
Not every IT admin is comfortable writing PowerShell scripts or searching for them, which is why it’s so convenient to have other options. You can learn how one customer used sapio365 to save thousands of dollars by finding inactive Microsoft Office 365 license costs here. sapio365 is a great tool for many other typical IT admin tasks and can help save you hours of time every day.
If you have a challenge that you thought was impossible to solve, why not request a demo? Or get a free trial of sapio365 and see what it can do for you!
blog_sapio365



Submit a comment