How to Clean up Teams with Guest Members
Inviting guests to your Teams may have been a great idea when everyone started using Teams. It was a handy feature that allowed you to share content with people external to your organization. But what do you do if the content, ideas and conversations have become too sensitive to share with your guests?
If you want to take the “No guests allowed in any Team!” position, there’s a Teams-wide setting you can use in the Admin Center or in the Teams Admin Center that will close the door, making sure your users cannot add future guests to Teams.
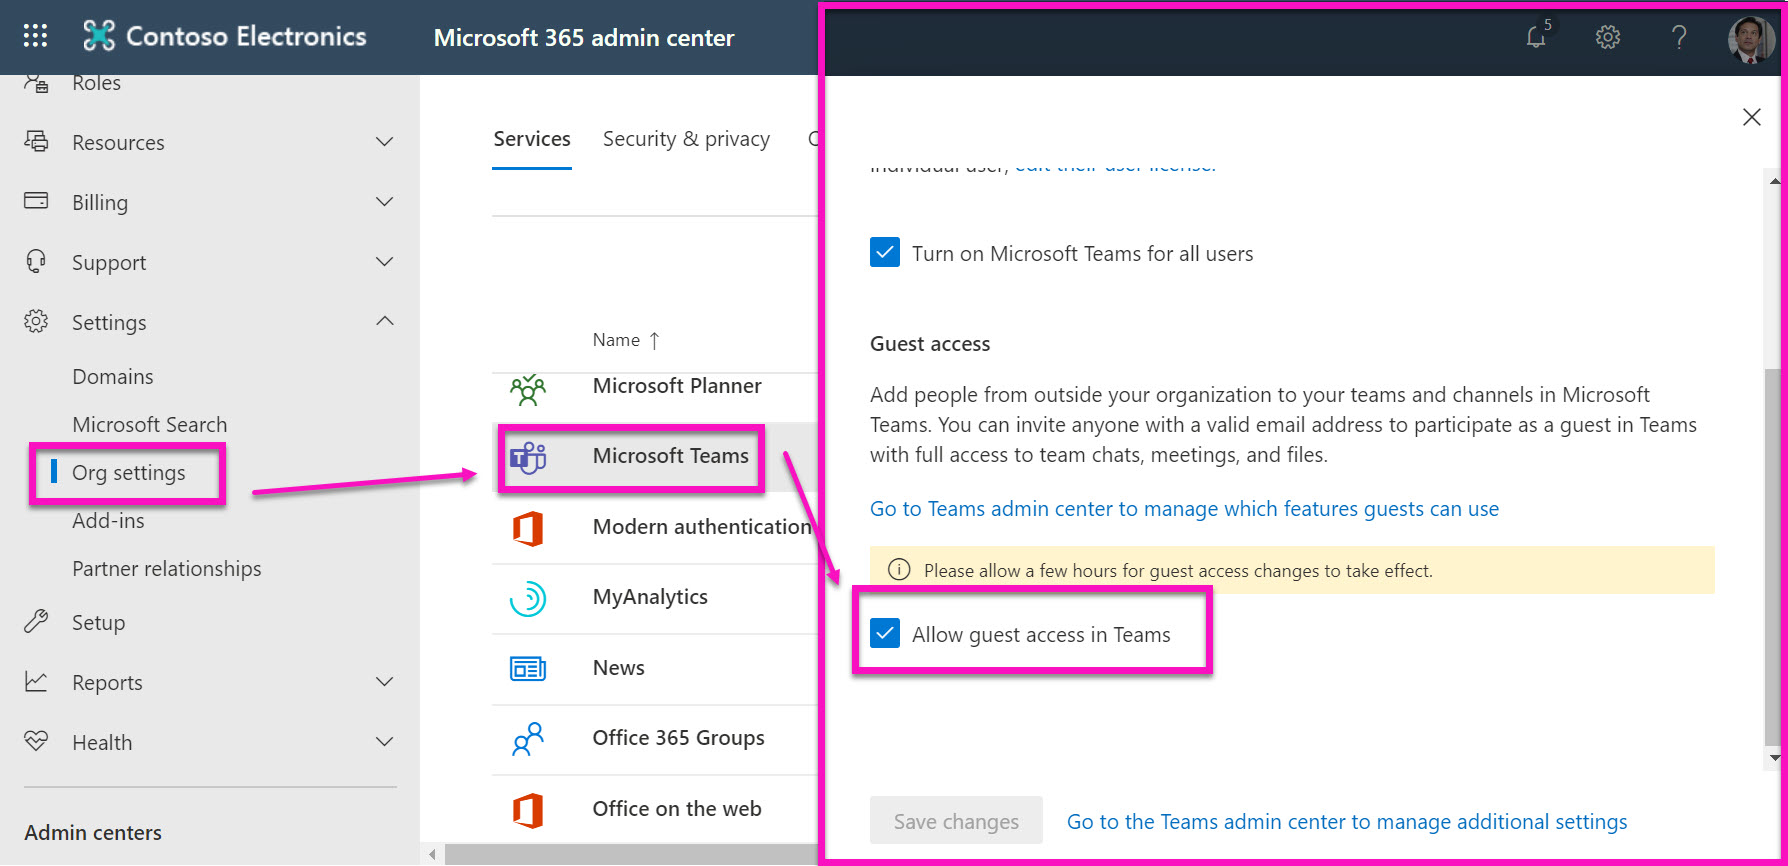
You can also manage that setting in the Teams Admin Center.

You’ll still have to remove all the guests from every Team and that is certainly a tedious task that most admins want to avoid.
If you’re looking to block guest access for all of your Teams except a select few, the tenant-wide setting must be enabled but you’ll need to resort to PowerShell to exclude those specific Teams, and that’s if you’re up to the challenge of script writing. Here’s a handy article that covers this topic.
The good news is that managing these settings can be done in a few clicks with sapio365, so let’s look at how easily all these options can be handled in sapio365.
sapio365 to the rescue!
We’ve created an automated job in sapio365 that allows you to find Teams that have guests and see if the guest addition is enabled. You’ll even be given the choice to disable the “Allow add guests” setting for existing Teams and to remove their guest members if you want.
Click on the appropriate job, depending on whether you want to apply this job to all existing Teams (1) or on just a selection of Teams (2).
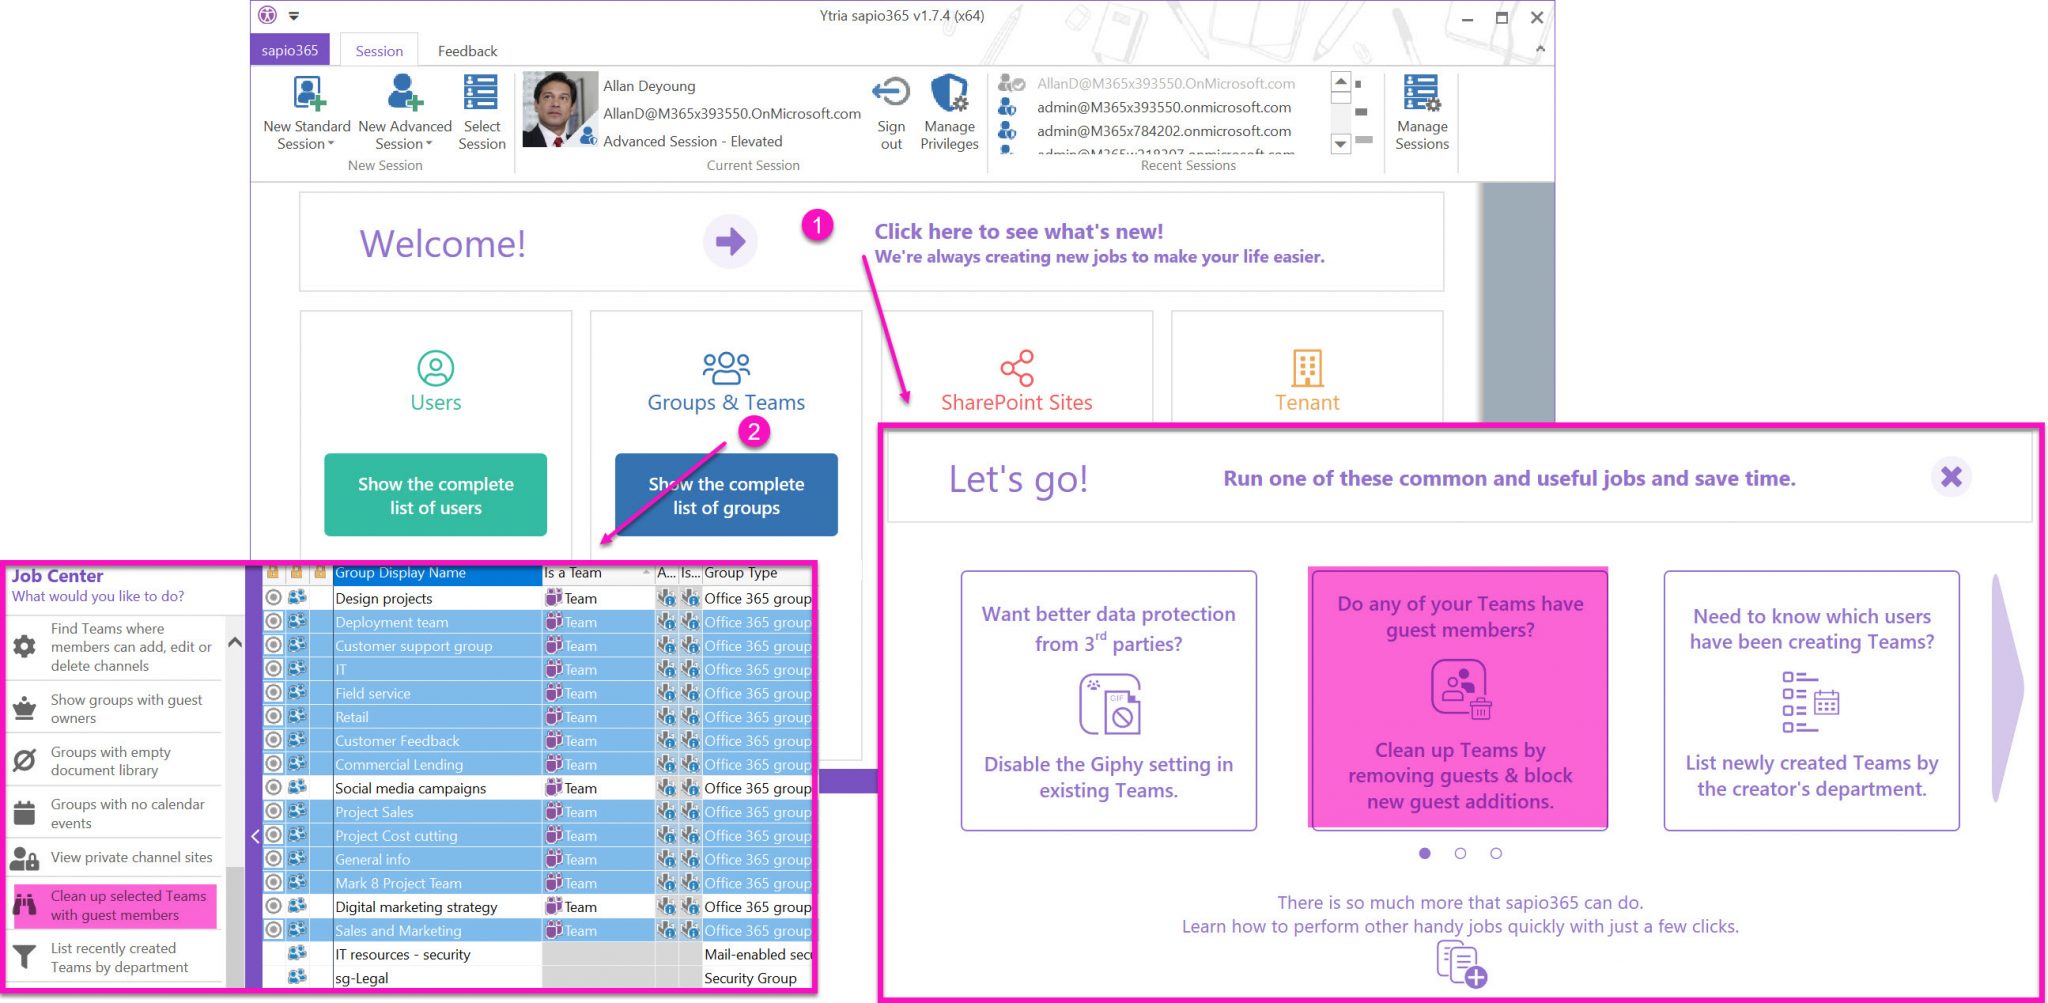
Whichever path you choose, you’ll have the choice to clean up the Teams by disabling the “Allow to add guests” member setting and by removing guests from those Teams – it’s up to you!
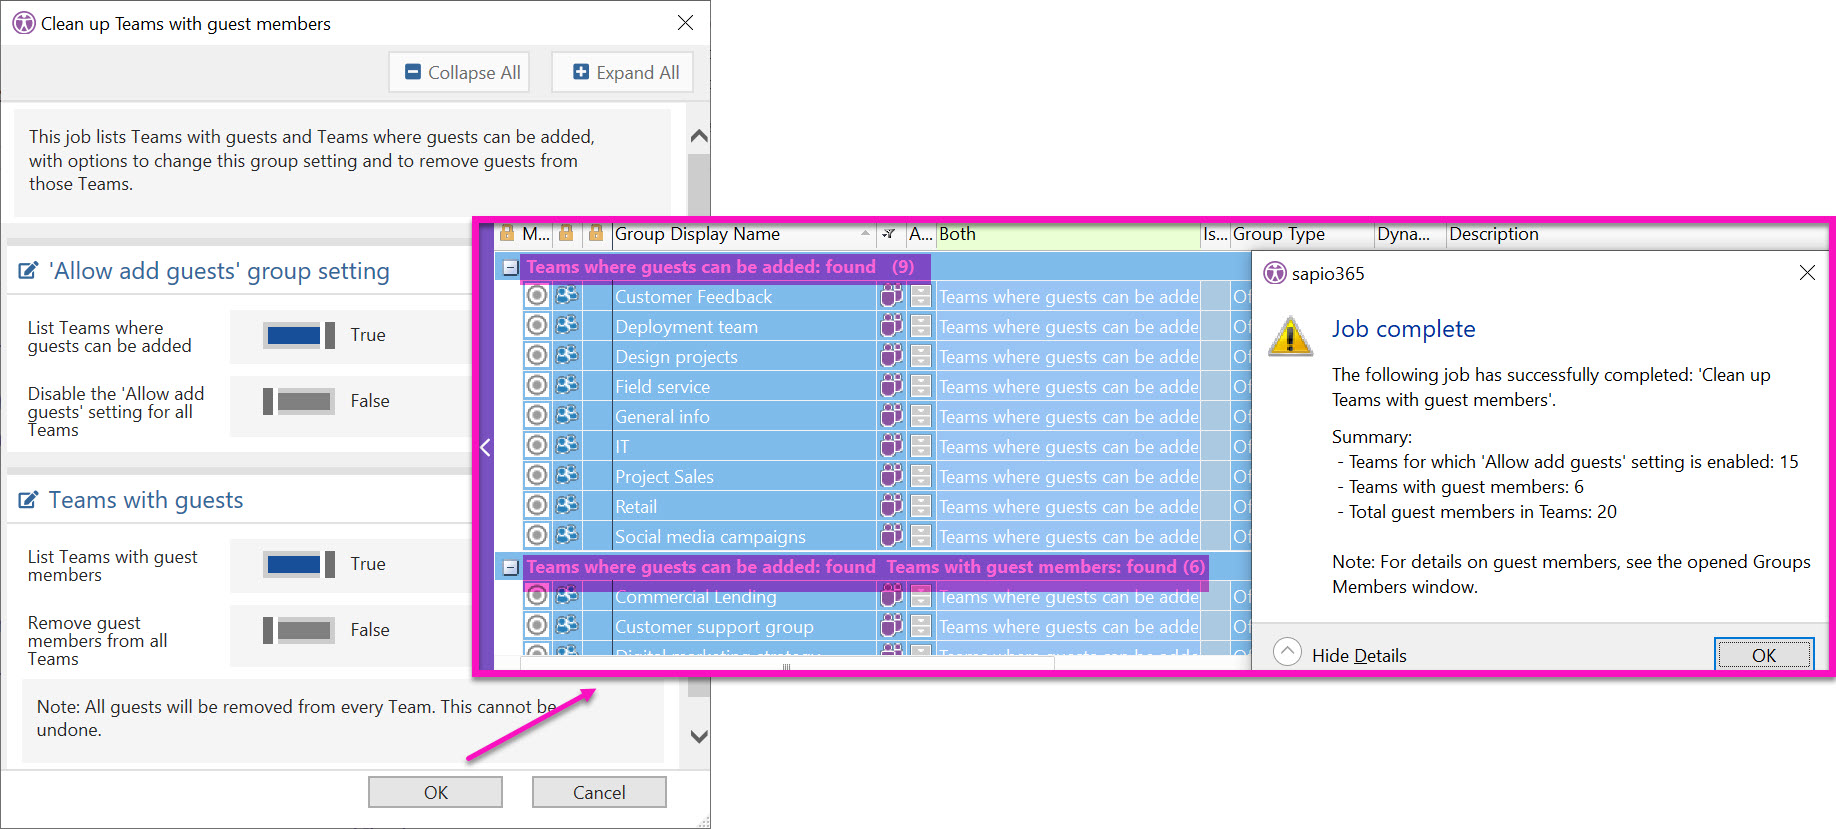
If you’re the cautious type, you can just opt for the identification of Teams with the enabled setting or with guests present. You can then decide which Teams you’d like to clean up. You can see how to do this in the section below.
Clean up Teams in sapio365 – step-by-step
To further your understanding of the versatility of what you can accomplish with sapio365, here’s a breakdown of the actions included in this automated job.
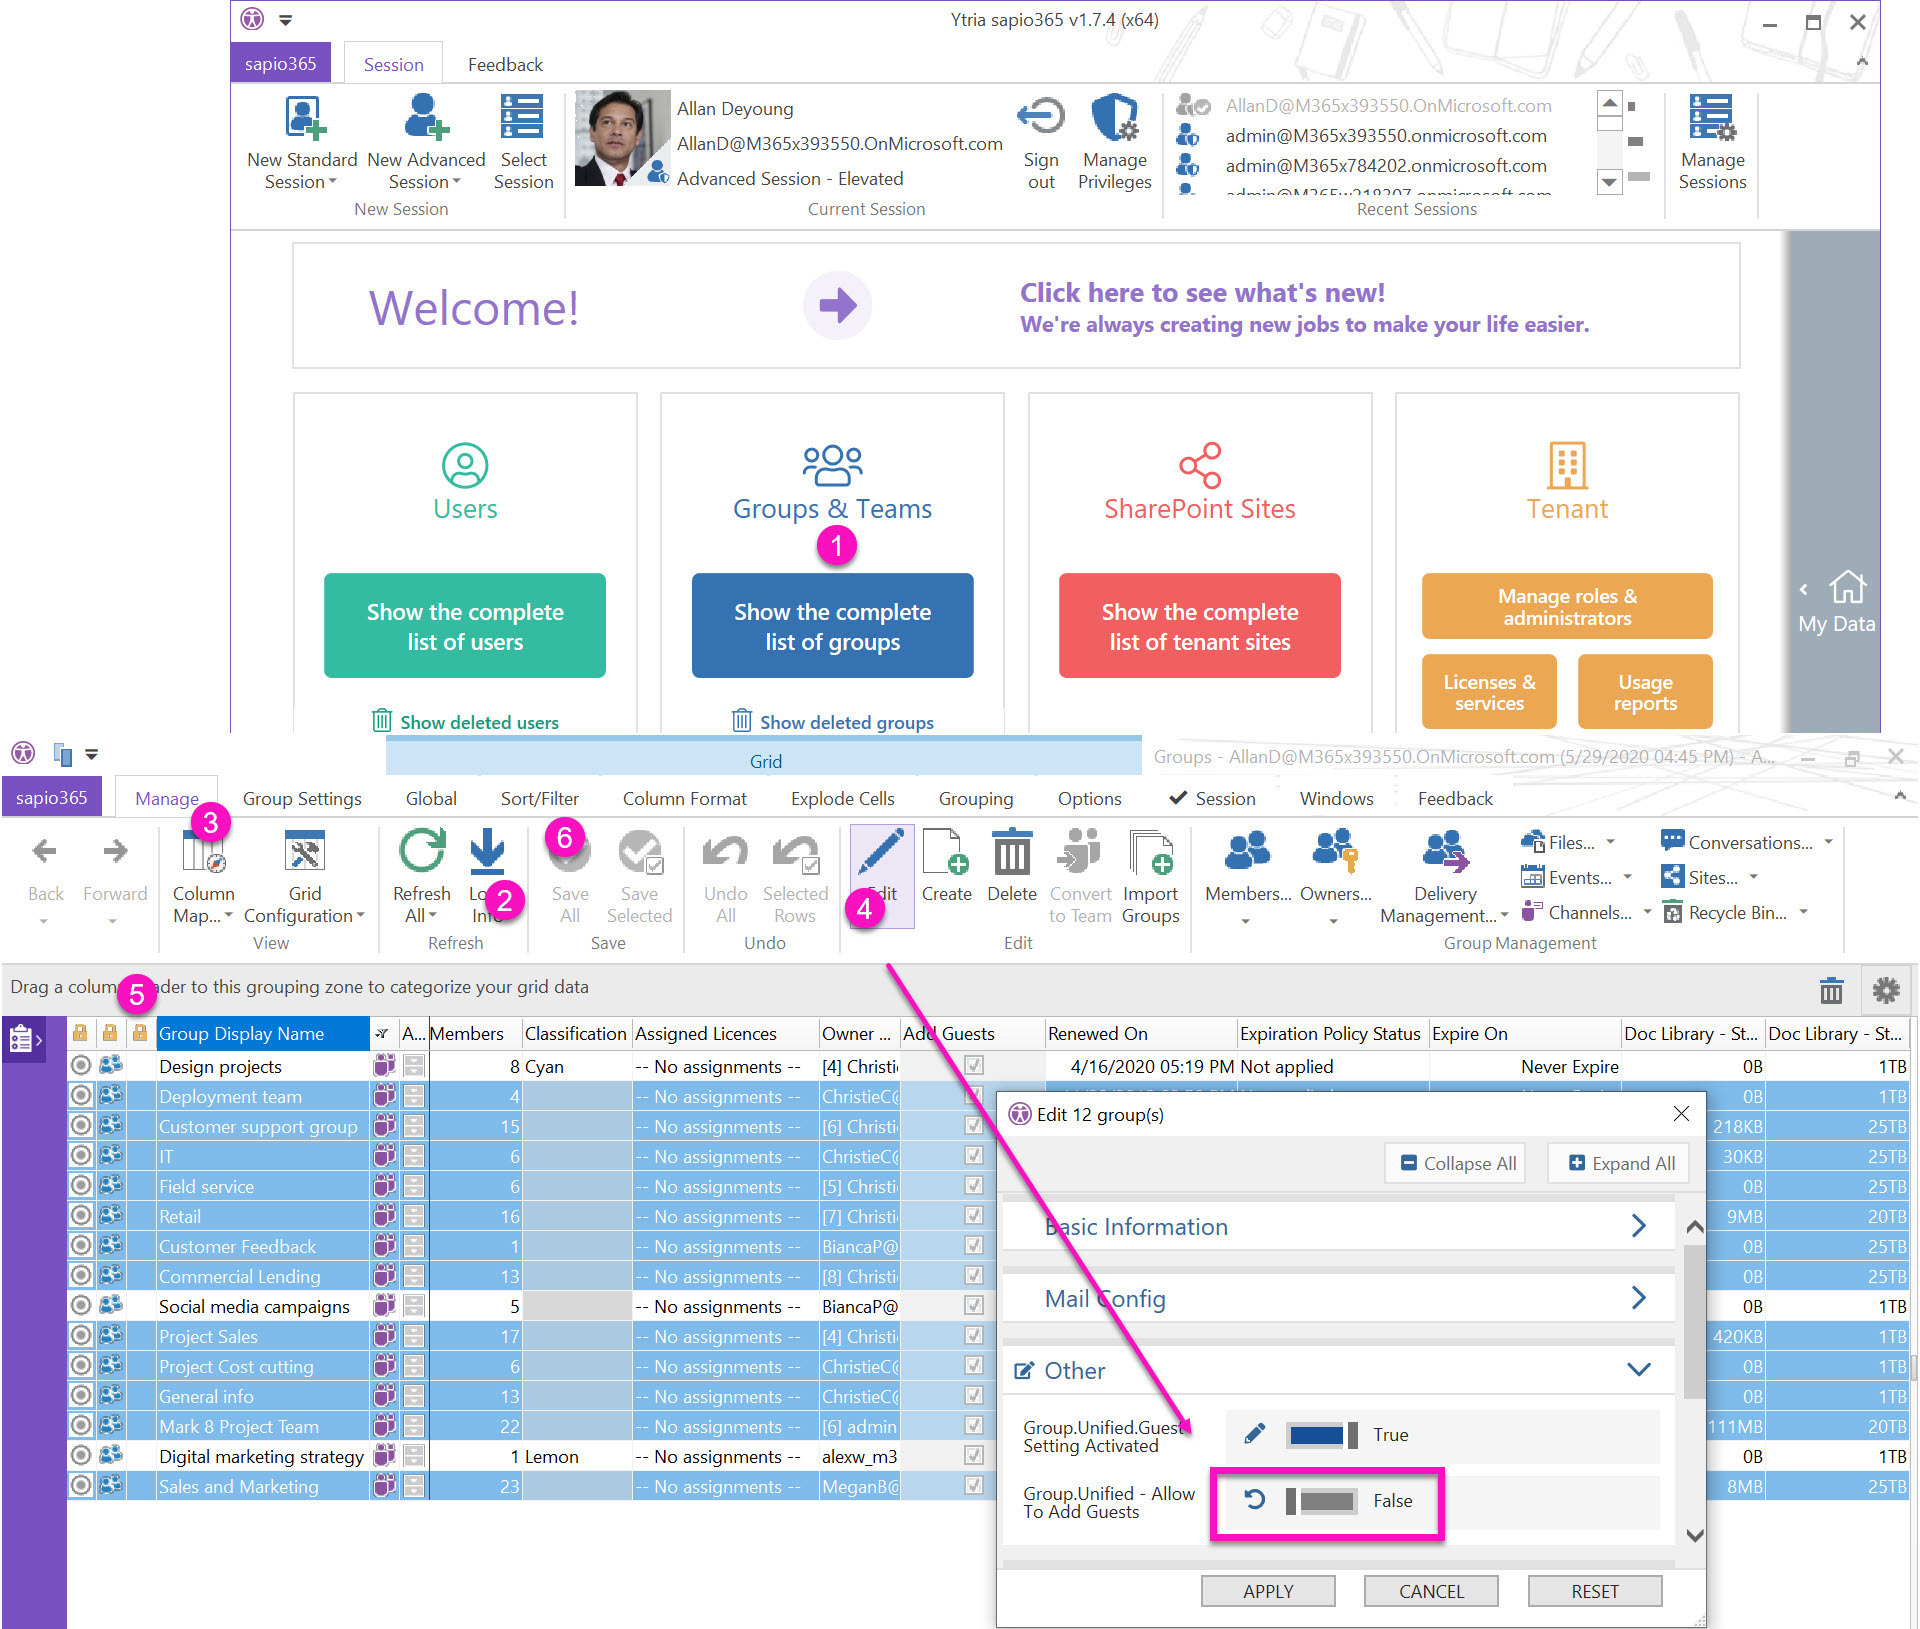
Disable “Allow guests” for selected Teams
- Launch Groups, and filter out non-Teams.
- Select all Teams and click Load Info to get Team Settings information.
- Use the Column Map to locate the ‘Add Guests’ column. Note that this is the effective status for the Team that takes into consideration the tenant-wide setting.
- Select the Teams for which you wish to disable this setting, and click Edit -> Other, and set Group. Unified – Allow to Add Guests’ to FALSE. Click on Apply.
- Review your changes using the Status column. You can still undo changes at this point.
- Click on ‘Save All’ to send the info to Azure AD.
Remove guest from Teams
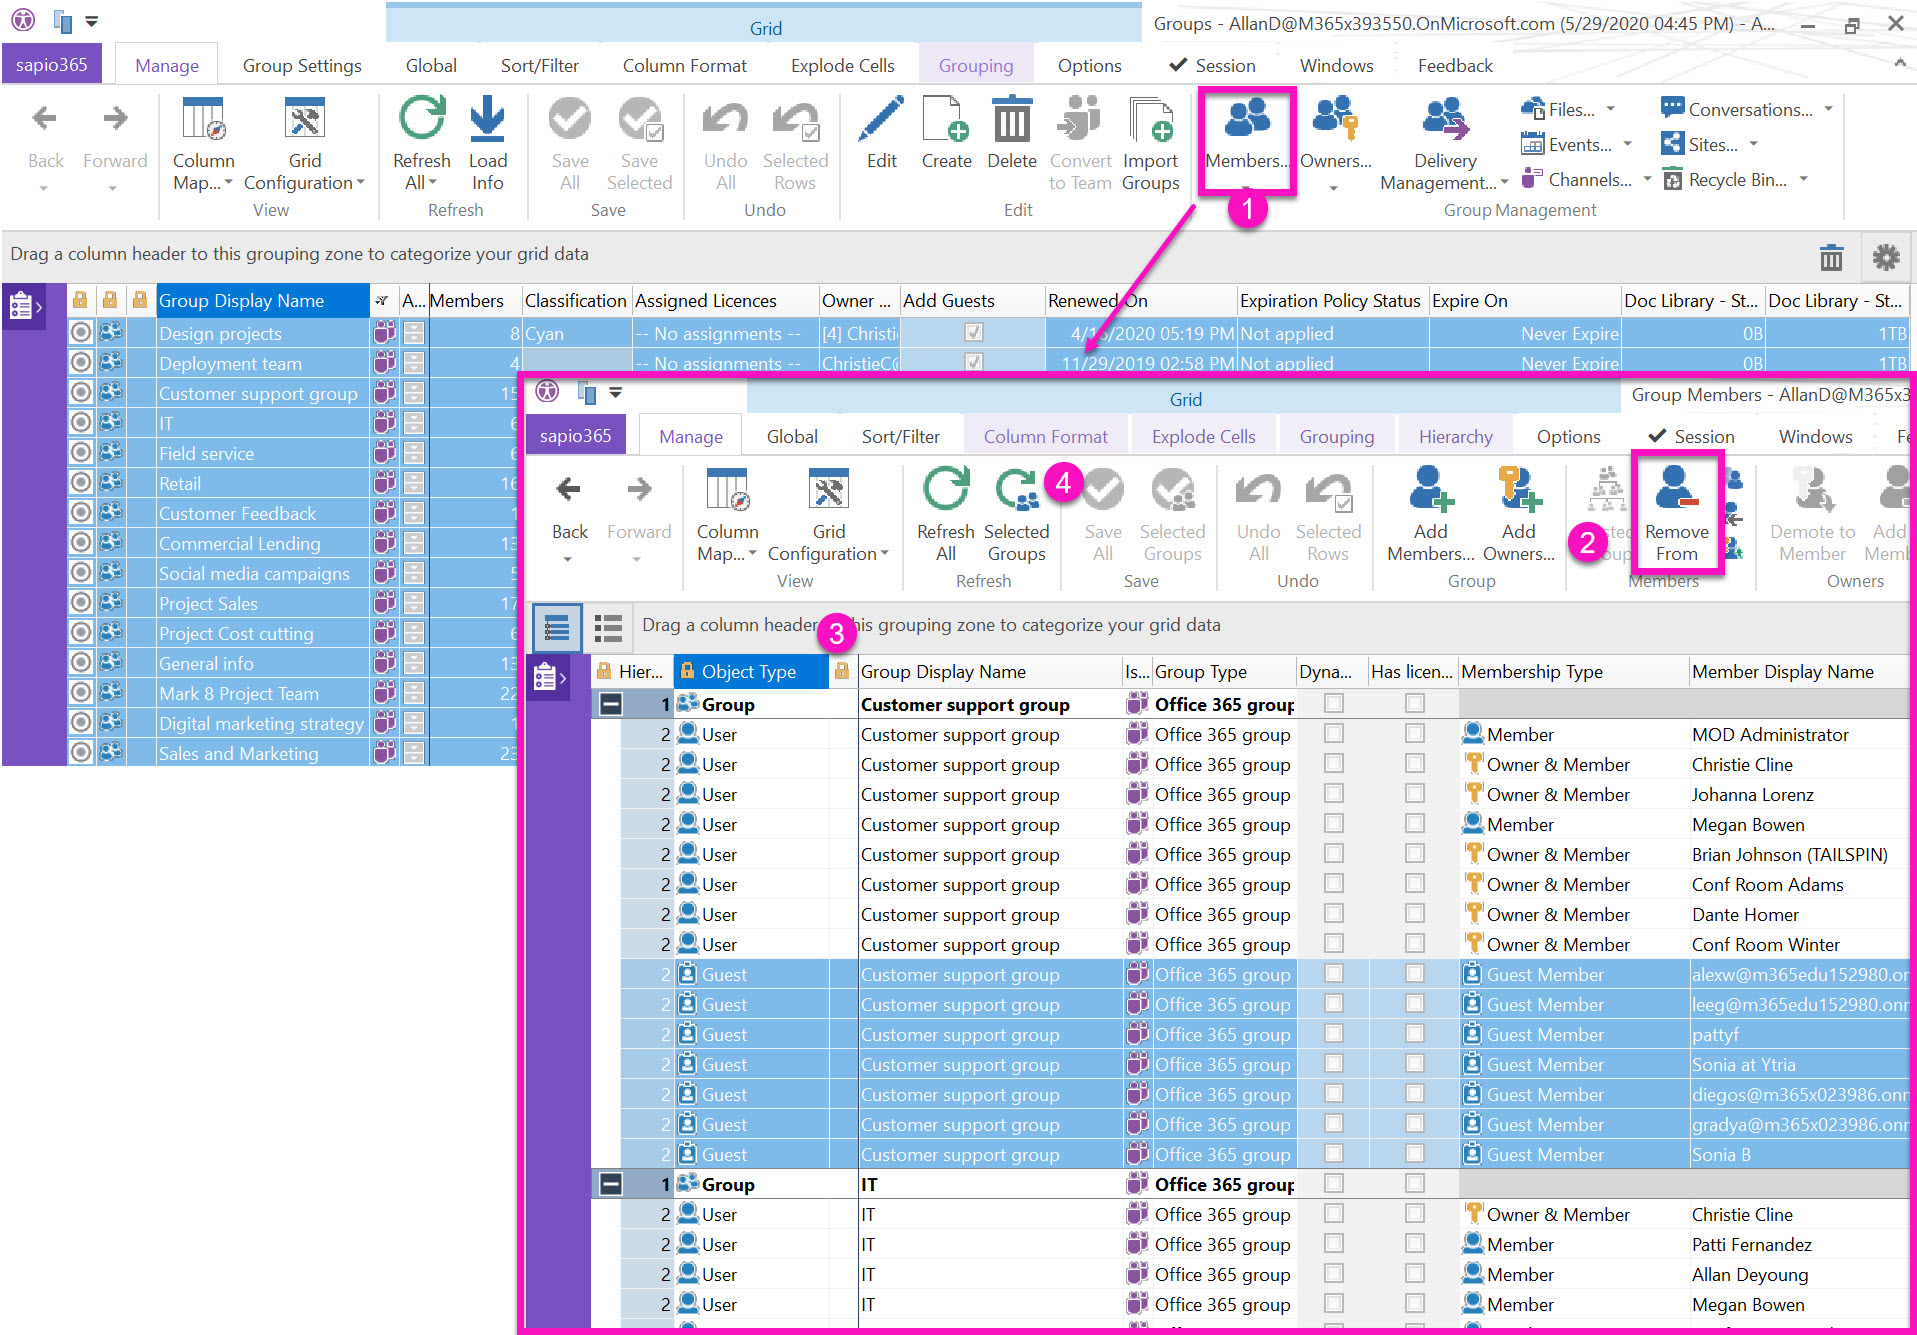
- If you’re not sure which Teams have guests, select them all and click on Members
- Select the guests you wish to remove and click on ‘Remove from’. You can also filter the Object type column to retain only guests to make it easier to focus on guests.
- Review your changes with the status column.
- Save your changes.
sapio365 gives you better control over your users and Teams, including settings that permit guest access to Team content. There’s no more worrying about who is sharing what with whom!
There’s also no reason to fuss with PowerShell when you can accomplish the same thing faster and more accurately with sapio365.
With just a few clicks in sapio365, you can resolve problems you may not even know you have. sapio365 is like your own personal genie in a bottle, allowing you to save time and get more done with just a few clicks – and no PowerShell scripts.
Check it out for yourself and see what you discover! You can try sapio365 free!

Submit a comment