How to set a welcome tab and a schedule tab in Microsoft Teams
As part of a project to create a paid online conference in Microsoft 365 by leveraging Microsoft Teams, I needed to add a welcome tab and a schedule tab for the users that registered.
This article gives you a step-by-step on how to set up these tabs.
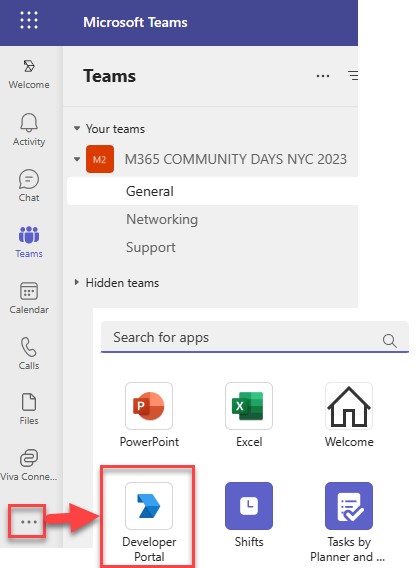
Teams configuration in the Teams Developer Portal
In the Teams Developer Portal, create a Welcome Tab and a Schedule Tab.
These two tabs are simply showing content of SharePoint Pages.
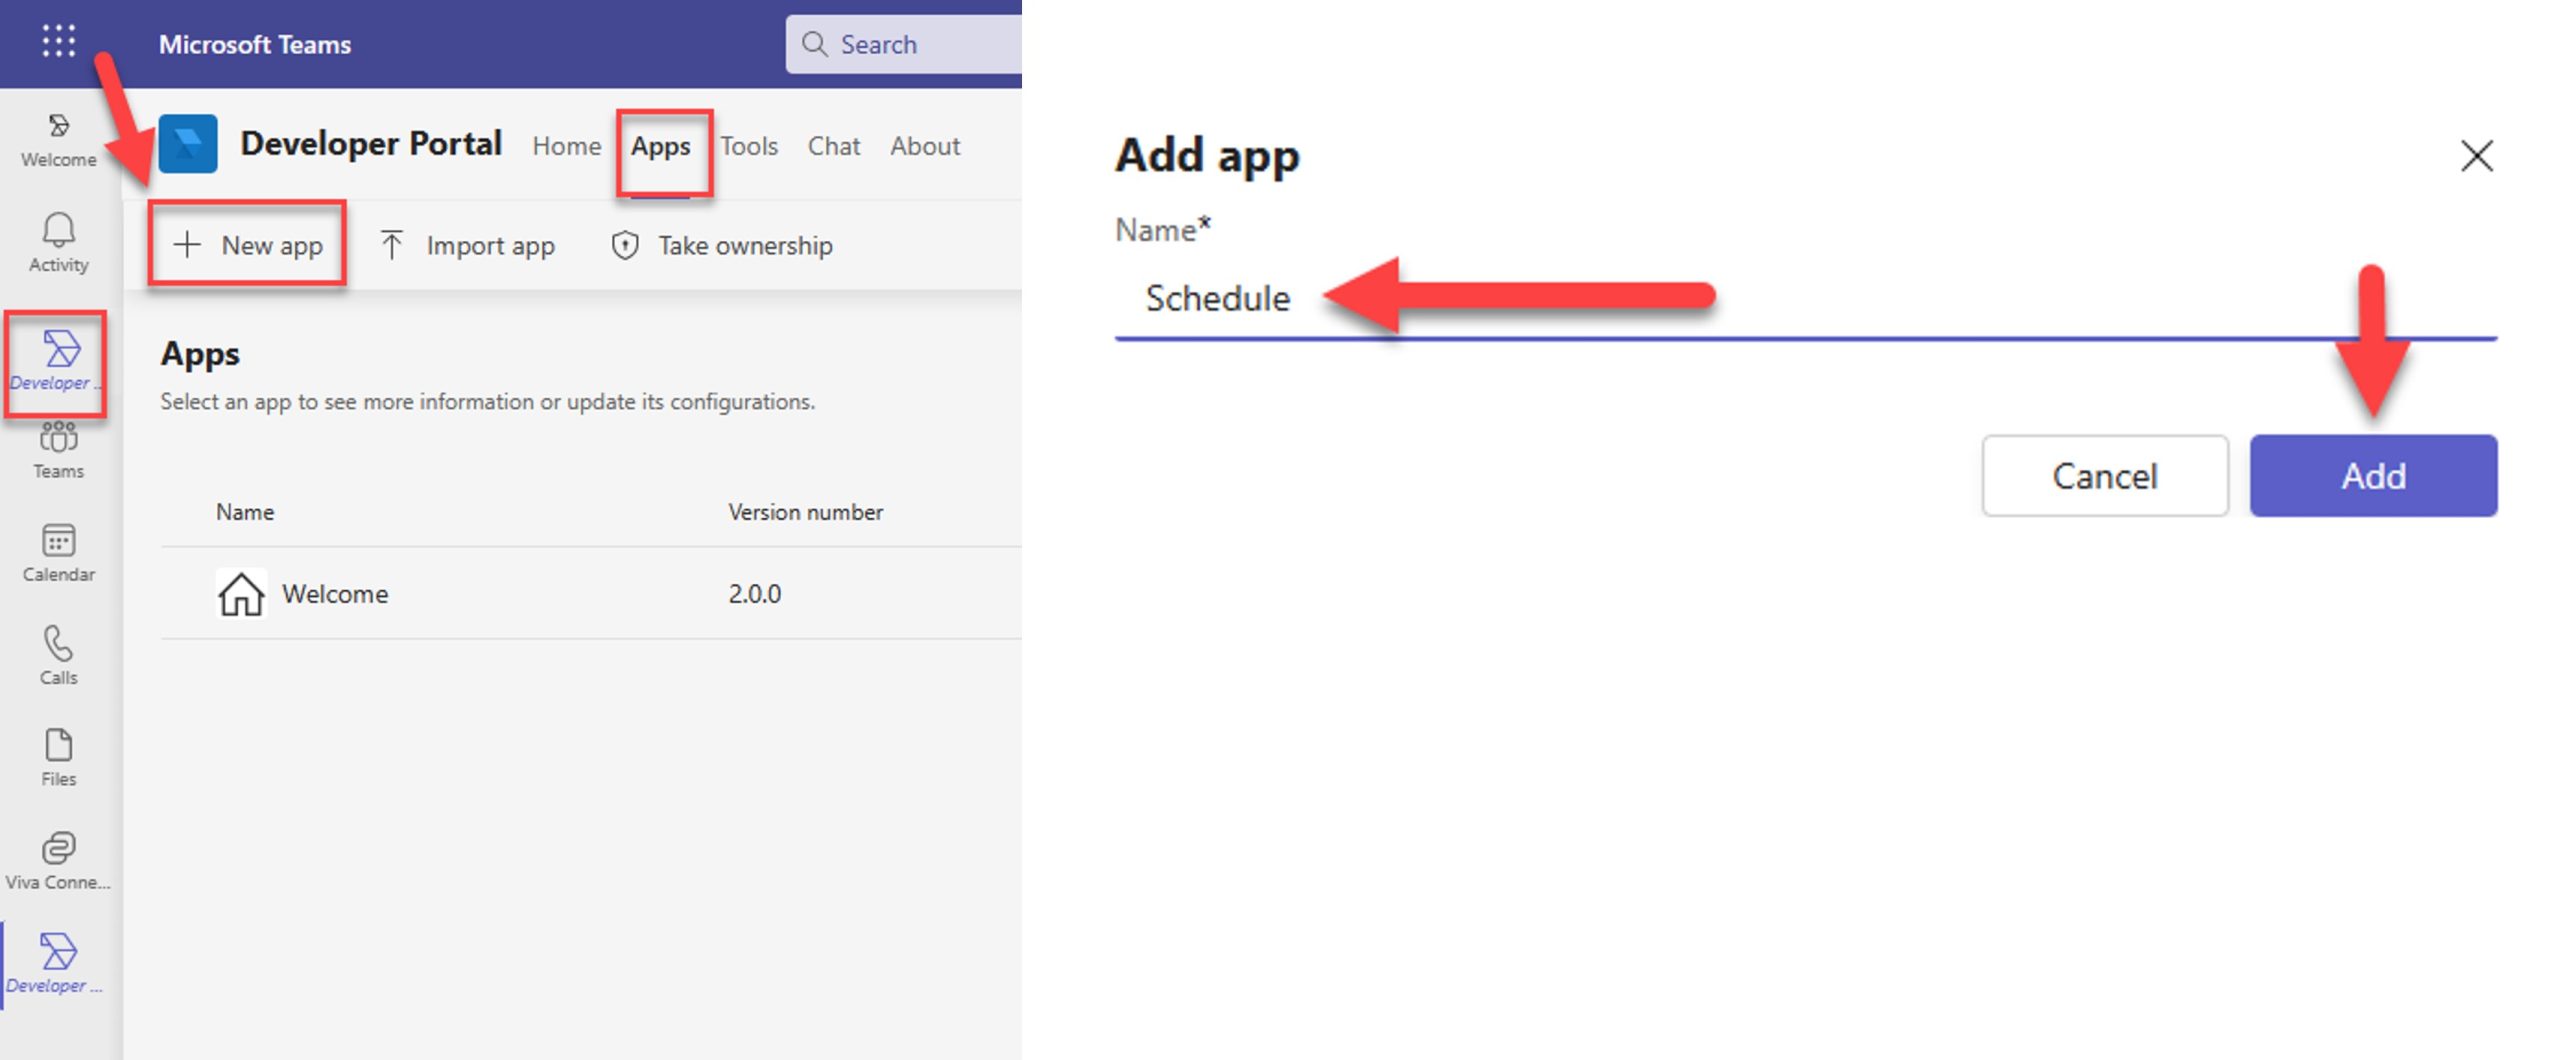
Create a new app from Teams Dev Portal
Create an app and give it a name.
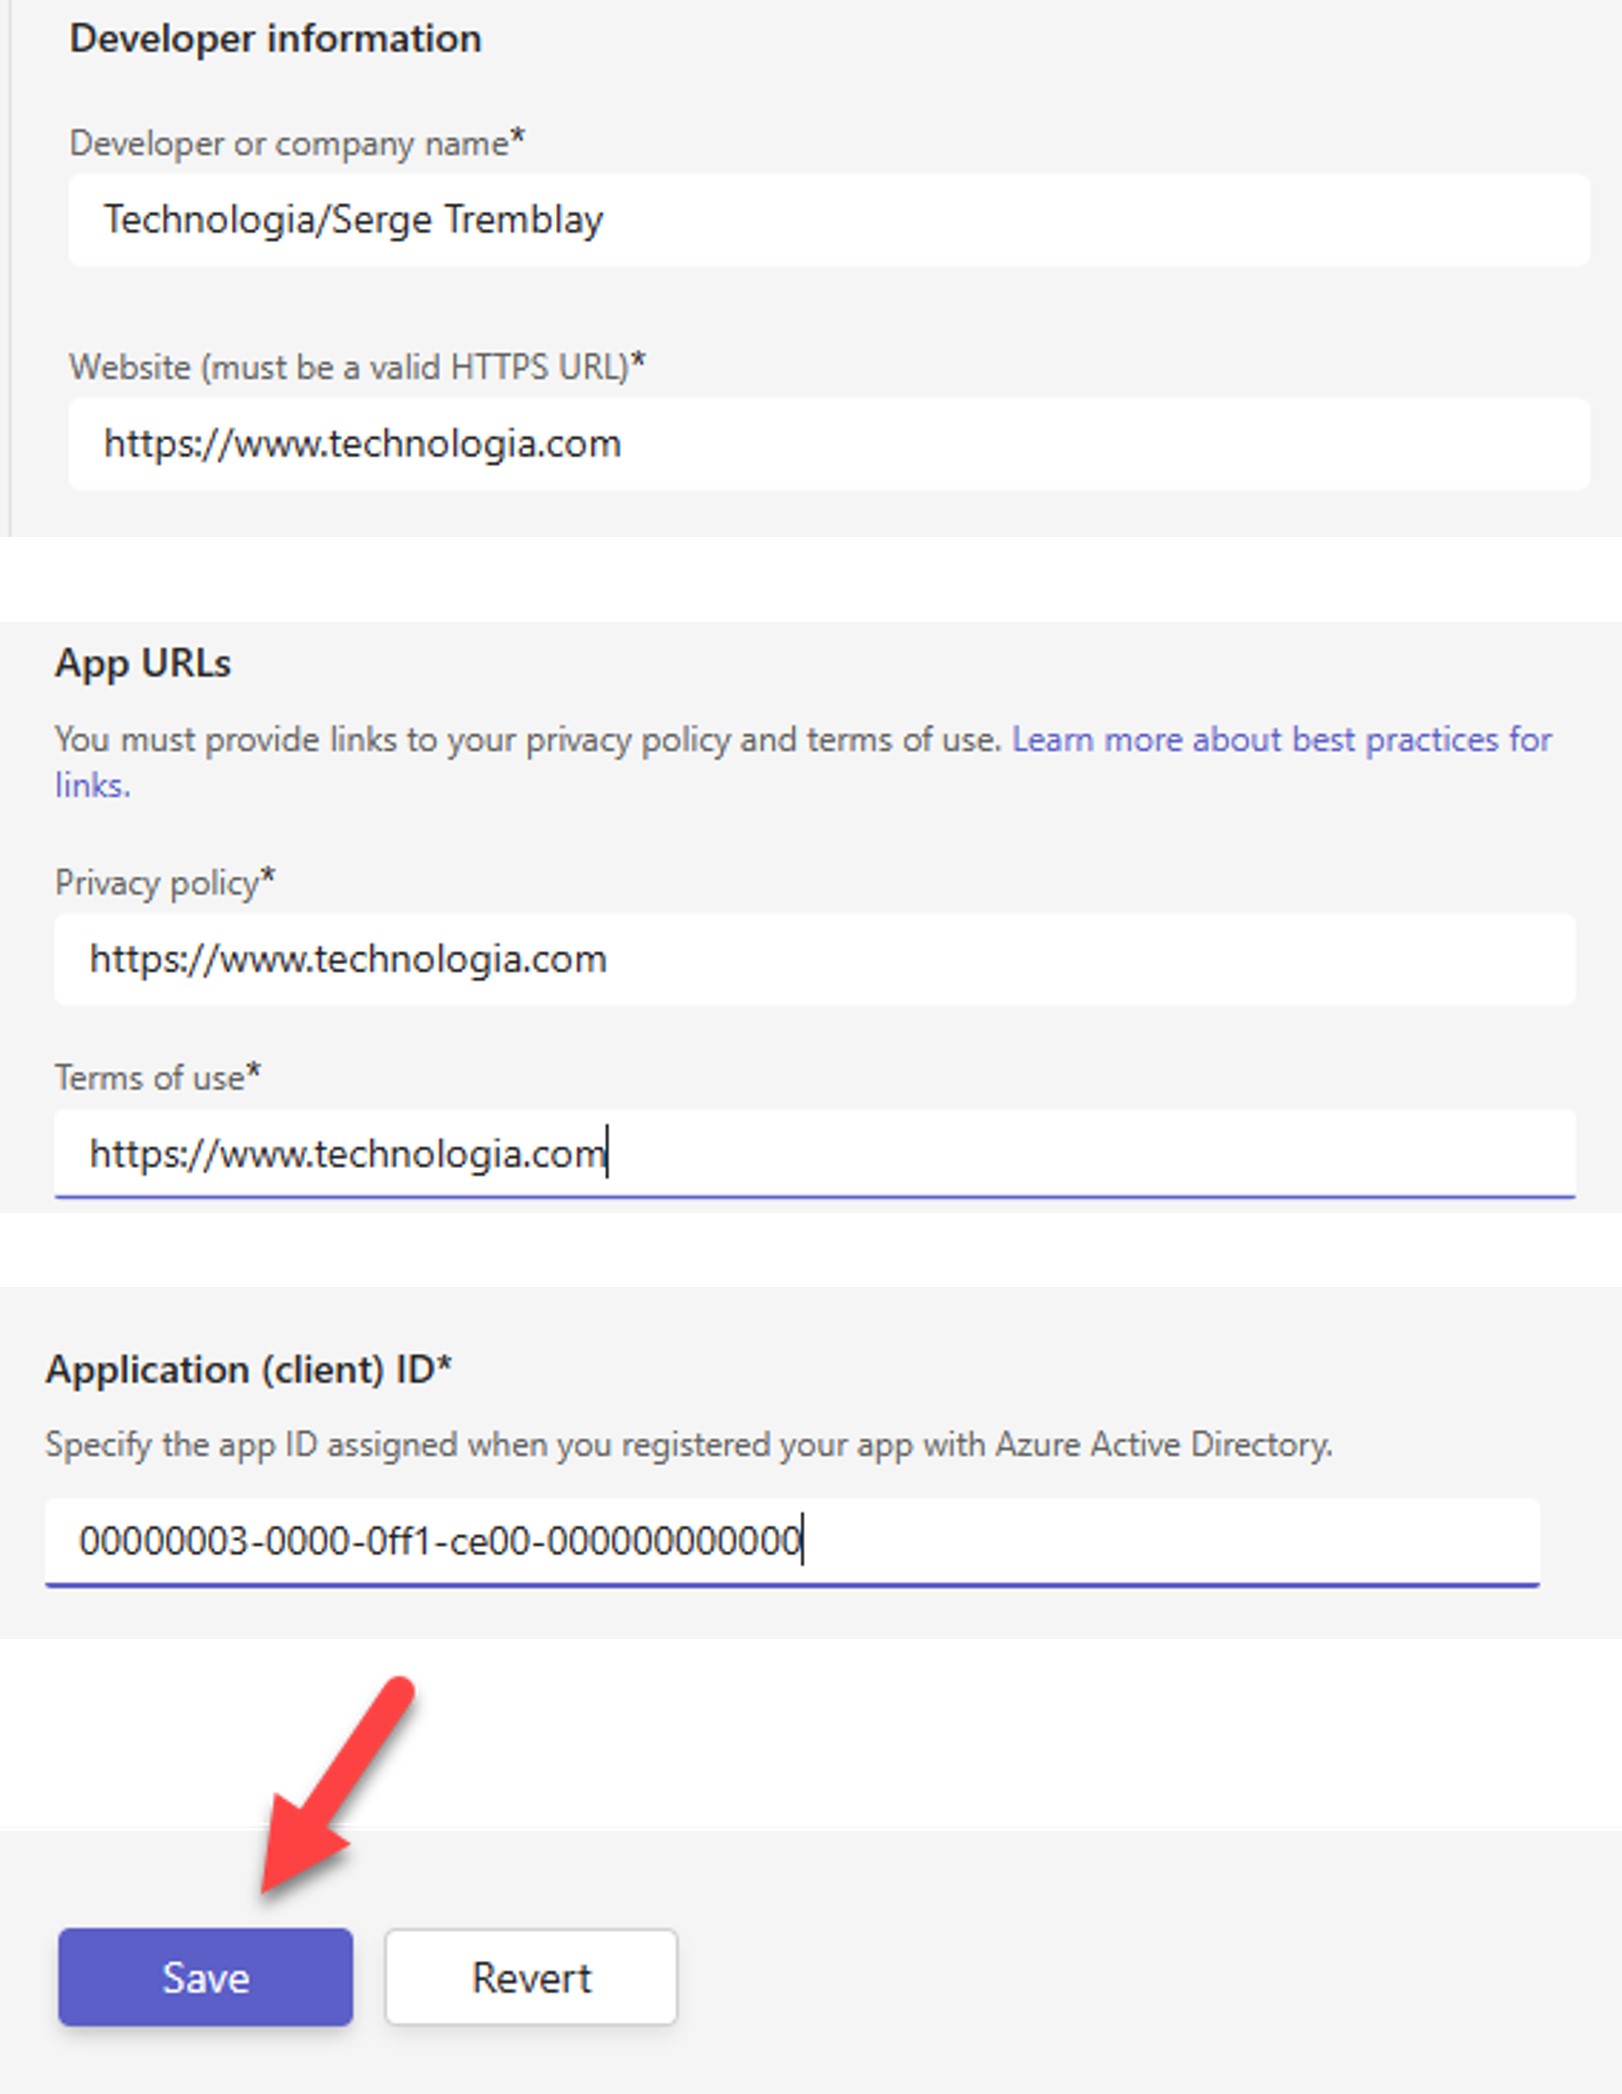
Add basic information
You must provide:
- Developer information
- App URLs
- App ID
Don’t forget to save!
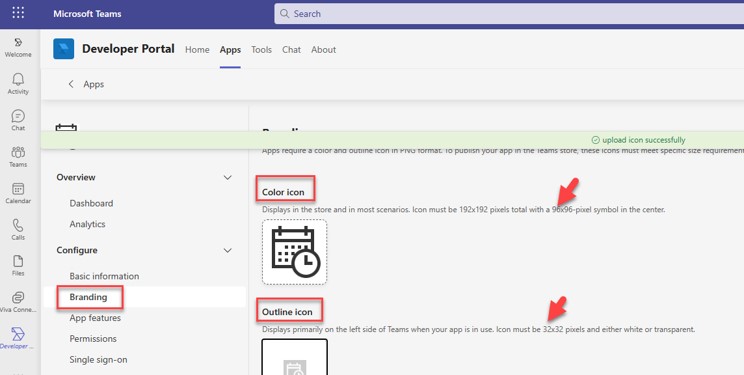
Branding
Upload images to display in the app an on the Teams left bar (Outline icon).
Use the right image size.
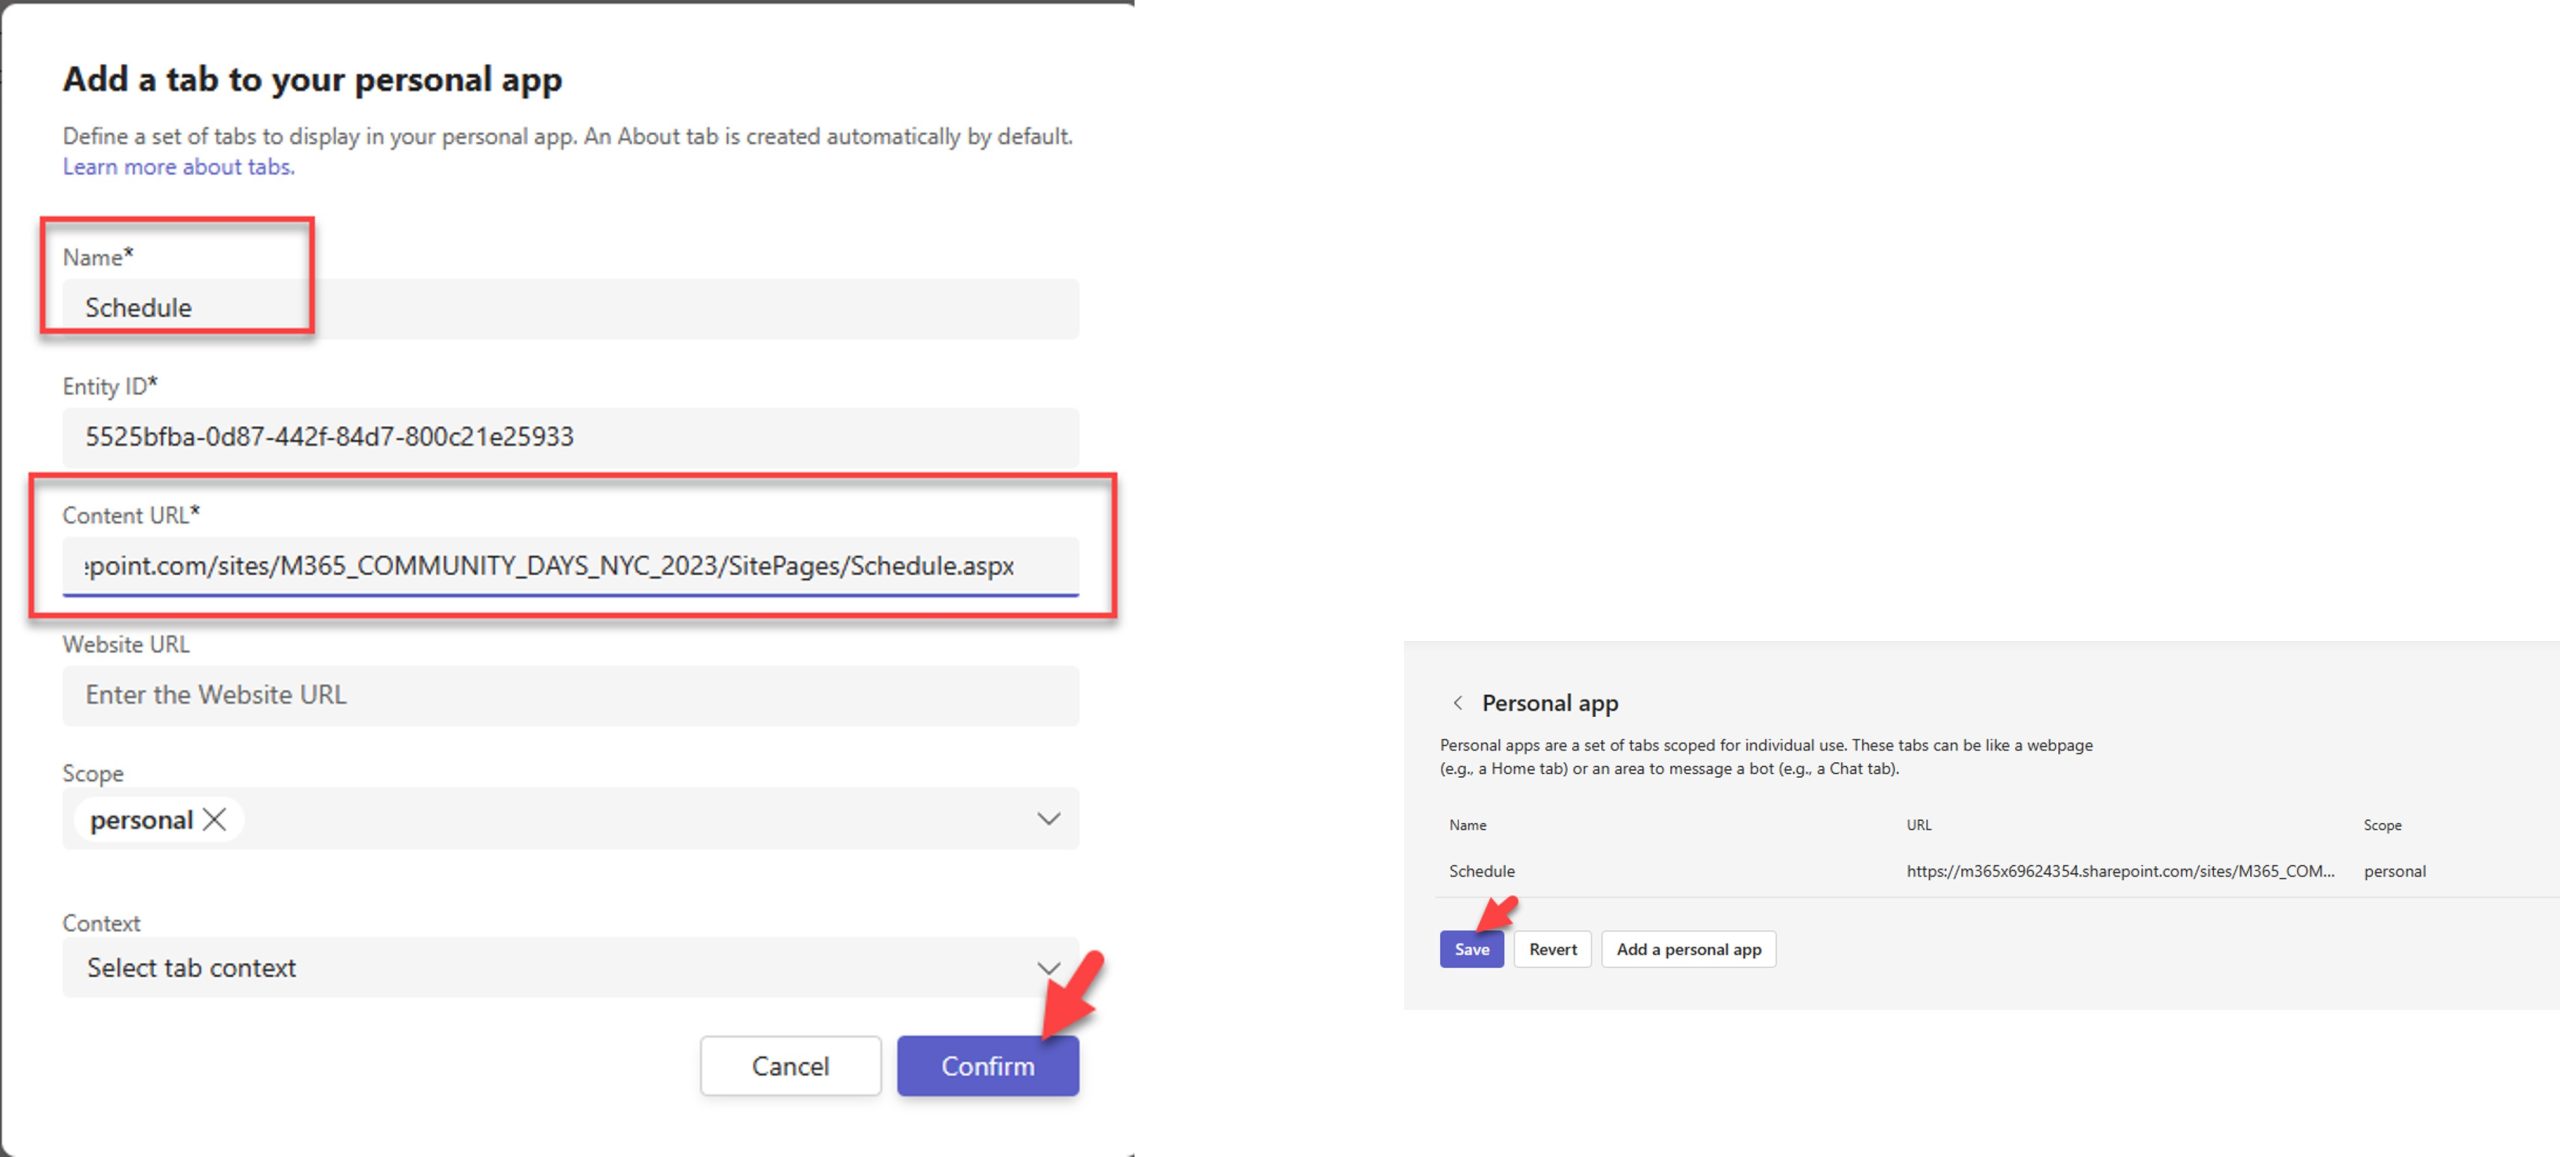
Add a personal App in the App Feature
Configure the personal app
- Give a name.
- Copy/paste the URL of the Schedule page that you created on the SharePoint Site.
- Keep all other default settings.
- Confirm and Save.
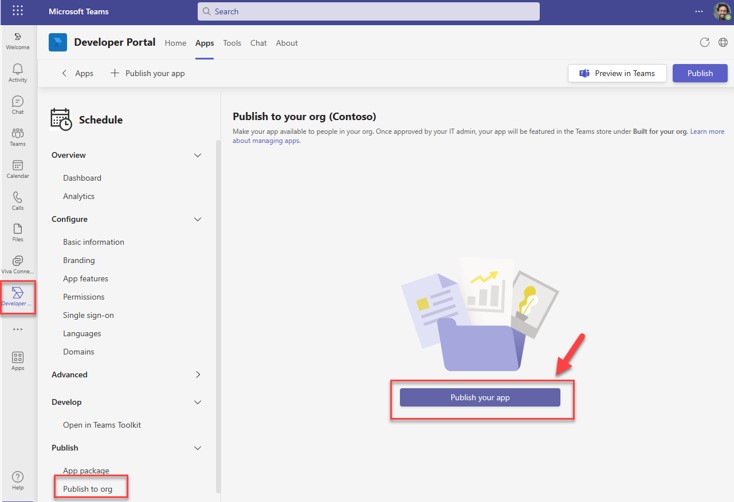
Publish your App to your Organization
Get Teams Administrator's approval
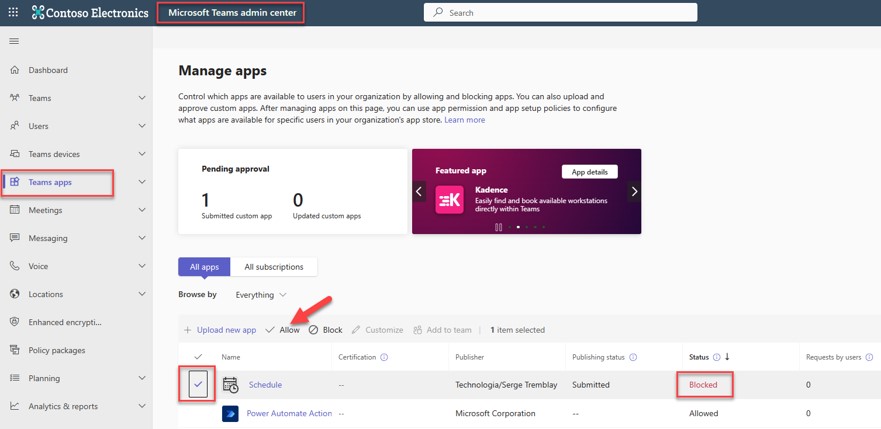
The Teams Administrator needs to approve by going to the Teams admin center:
- Click on Teams app.
- Click on the App that was submitted and publish the app.
Get Global Administrator's approval
The App must be approved by your Org Administrator.
To approve the administrator needs to select the blocked app and click on Allow.
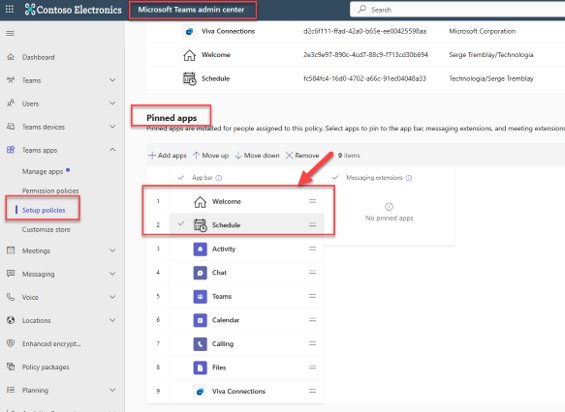
Teams App Setup Policy
Create a Team App Setup Policy to pin the Welcome App and the Schedule App to the top of the left bar.
Configure a group assignment policy to automatically apply the policy to all the members of the Team.
Information can be found here:
https://learn.microsoft.com/en-us/microsoftteams/assign-policies-users-and-groups
Not that you will need to use PowerShell for this type of policy:
New-CsGroupPolicyAssignment -GroupId M365_COMMUNITY_DAYS_NYC_2023@M365x69624354.onmicrosoft.com -PolicyType TeamsAppSetupPolicy -PolicyName "NYC Community days"
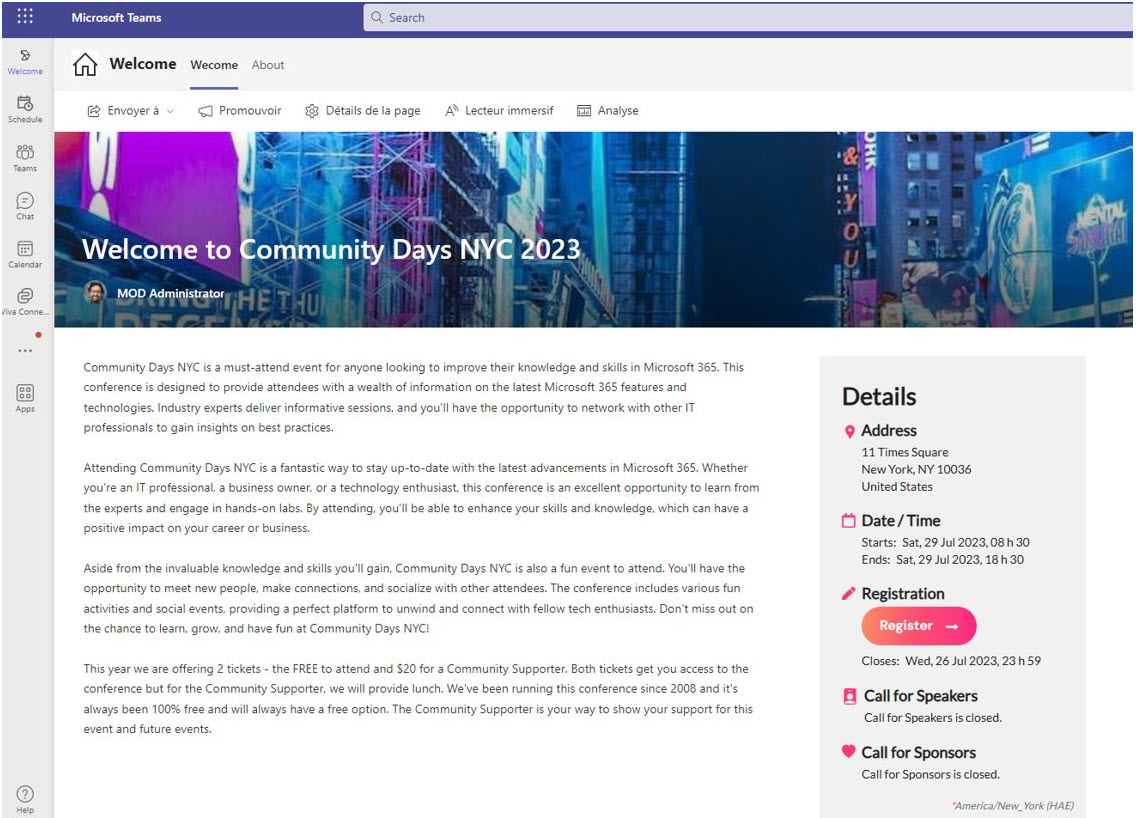
When users log into Teams, they see the Welcome page and the Schedule is right below



Submit a comment